Every home has one: the ‘redheaded stepchild’ room no one cares to see because it’s an eyesore and a challenge to update. For me, it was our half bathroom. Easily accessible from the two main entrances of our home (front door and garage), our half bathroom should be one of the first rooms to impress guests. Sadly, almost three years after moving into our first home, the half bath was like that one snaggle tooth ruining an otherwise perfect smile.

Paint is the most inexpensive way to transform a room. Pulling up floors and knocking down walls was a hard no on this project. I believe half baths (or powder rooms), should be decorated a little out of your comfort zone. Afraid of color? Choose a dark color, even if it’s just one accent wall. Afraid of patterns? Try a dotted print. I’ve seen so many half baths using patterned wallpaper to make a statement and they really look elegant. When I mentioned using wallpaper to Brian, I immediately saw panic and fear in his eyes. So the project was put on the metaphorical backburner until I figured out what to do with the space that didn’t require pulling up the builder-grade brown tile.
So when I heard that Target carried peel and stick, repositionable (see also: EASY to remove) wallpaper I immediately knew how I would (finally!) makeover this half bathroom: an accent wall! After viewing all of the Devine Color by Valspar products available exclusively at Target, I fell in love with the peel and stick wallpaper.
Choosing Removable Wallpaper

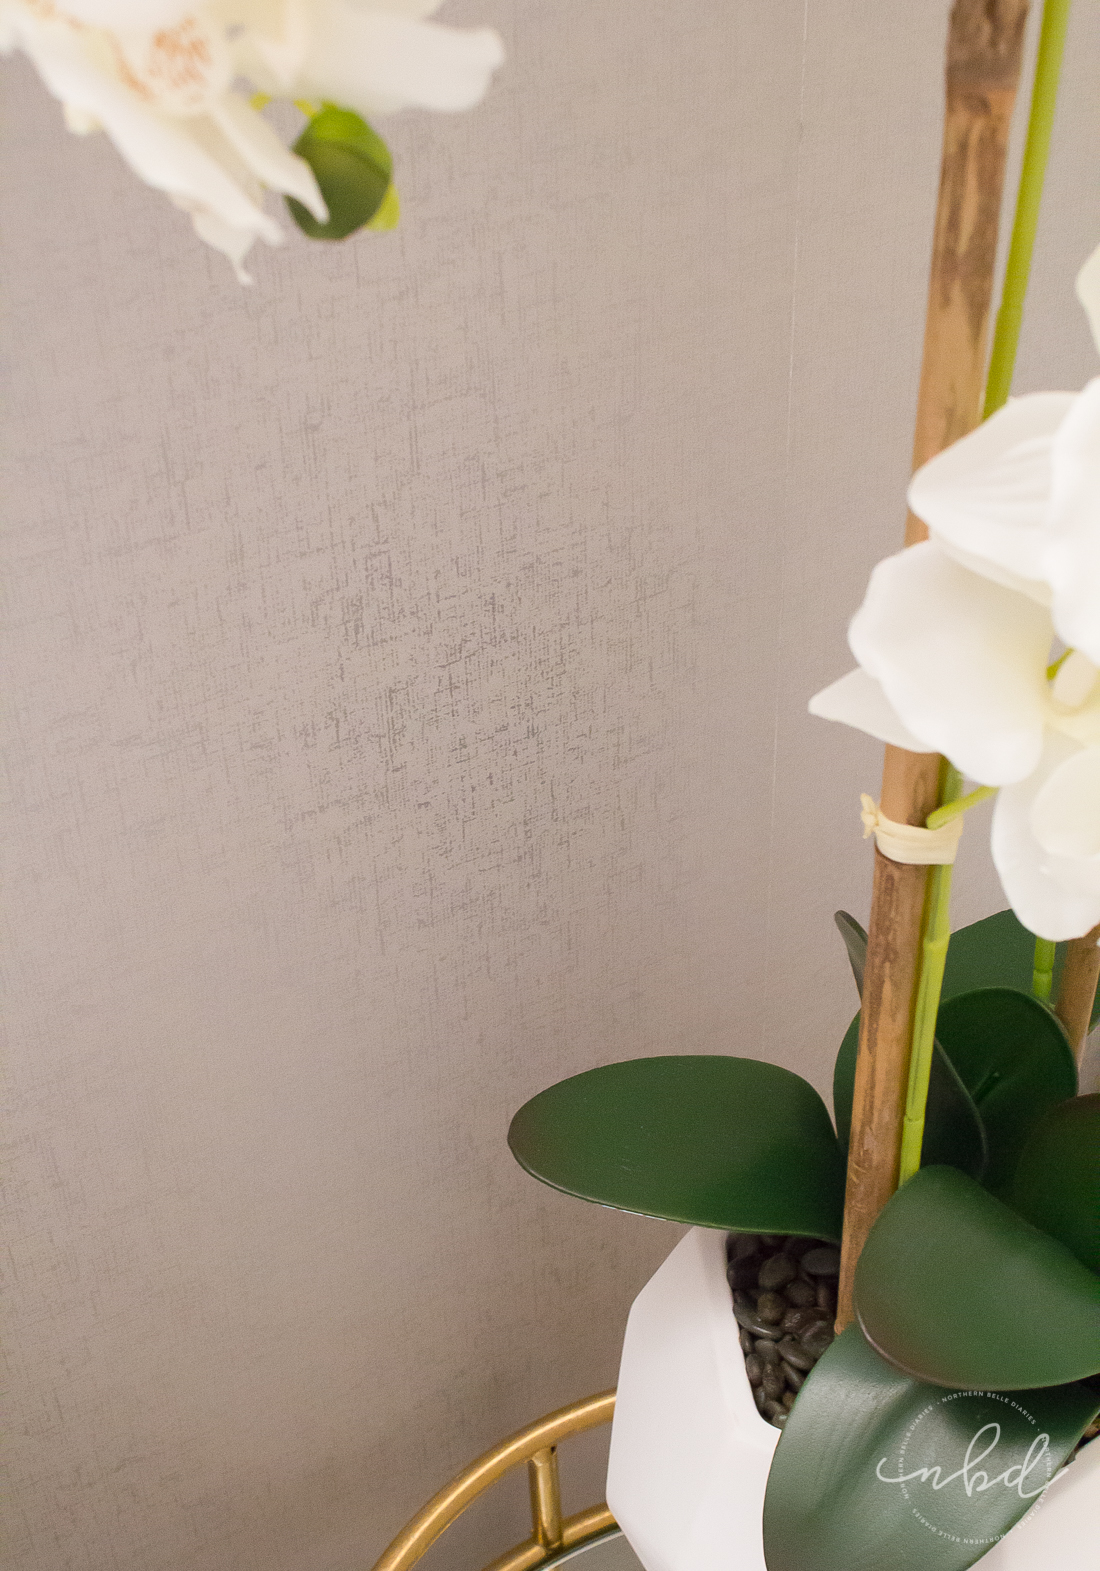
I liked that it was in my favorite wall color, gray, but it has subtle brushes of metallic silver that lend an air of elegance. The way it catches the light really gives the room the glam factor. Since the half bath has no windows it is a bit hard to catch on camera. But in person? Divine. It was extremely difficult to choose one pattern because they are all so gorgeous! The Devine , , and patterns were serious contenders!


Devine Color + Target created a gorgeous peel and stick wallpaper, pre-mixed paint, spray paint, and stir-in metallic sparkle dust available exclusively at Target. The base color of the Devine Color Weave Mirage & Silver wallpaper is the same shade as Devine Color paint in Mirage. Devine Color has complementary paint colors, which are listed on the packaging of the wallpaper to make choosing a paint color a breeze! The Devine Color paint in Sterling is the perfect complementary shade for this particular wallpaper.
I found the Devine Color products in the home improvement aisles (near the batteries and HVAC air filters). Target makes it so easy to pick up coordinating home décor. Throughout this post I’ve linked to the products I picked up (and similar products when they’re no longer available online). All of the Devine products are available for purchase online as well.


Elegant Half Bath on a Budget Tutorial
As a general ‘DIY home project’ rule of thumb, be prepared for the unexpected. In my case, I had a LOT (and I mean a LOT) of prepwork to do before I even touched the wallpaper. I wanted to remove the builder grade towel bar, toilet paper holder, and the recessed medicine cabinet adjacent to the pedestal sink.


This meant cutting and repairing drywall, plus all of the dust that comes with sanding down joint compound. Dust. Everywhere.

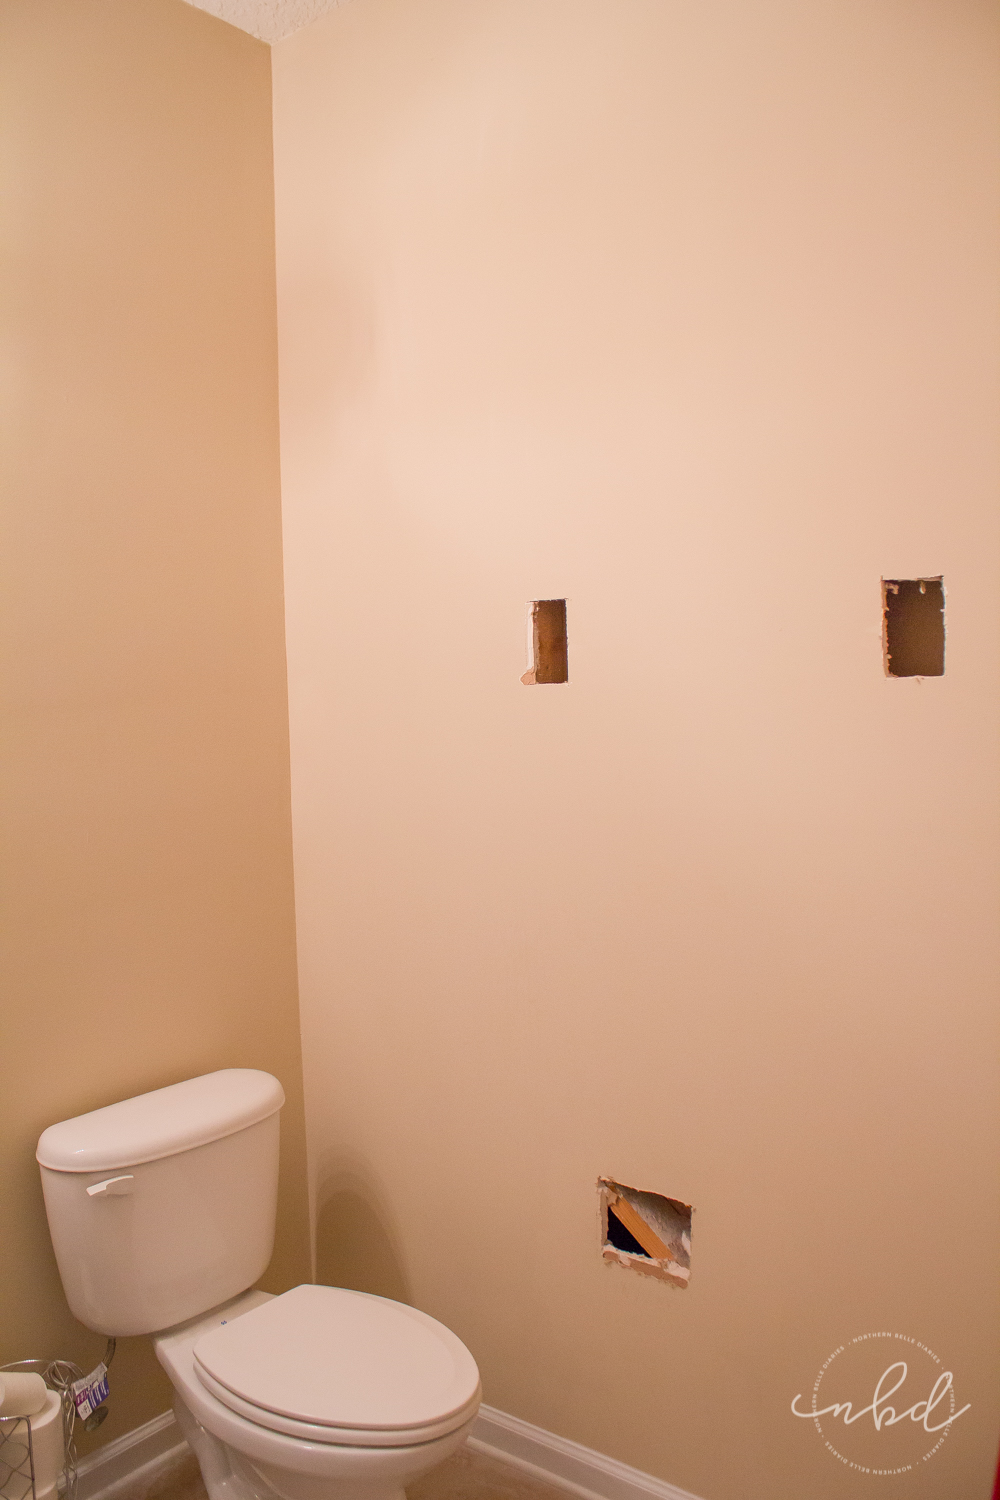
Pictured above, I removed the dinky medicine cabinet and builder-grade porcelain towel and TP holders. Repairing the drywall cut-outs was tedious.

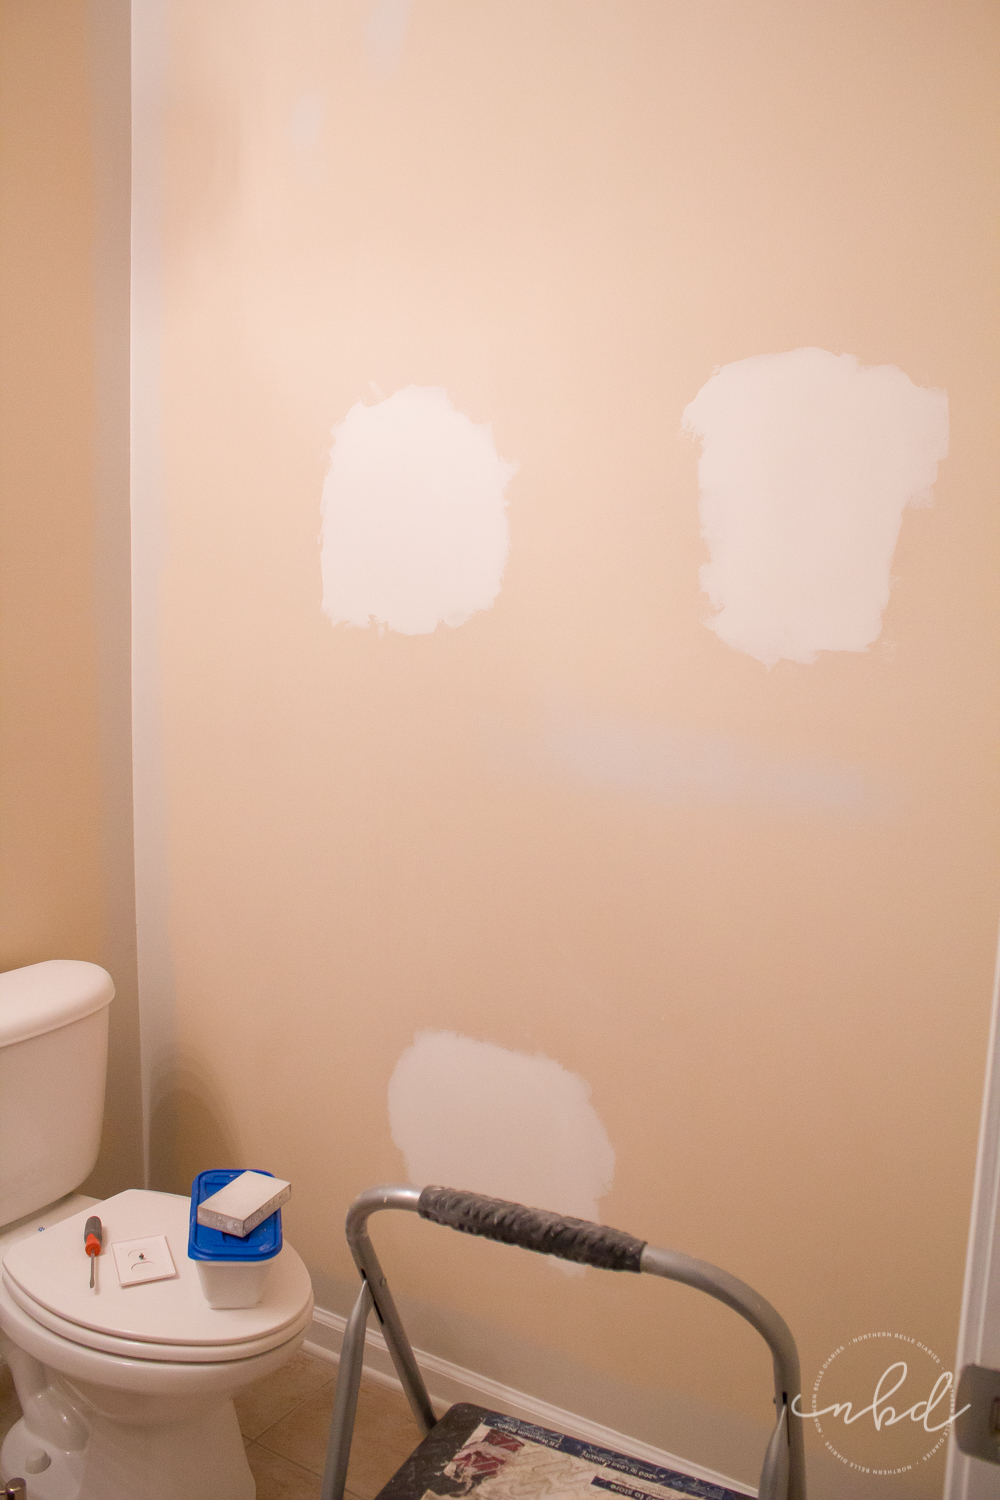
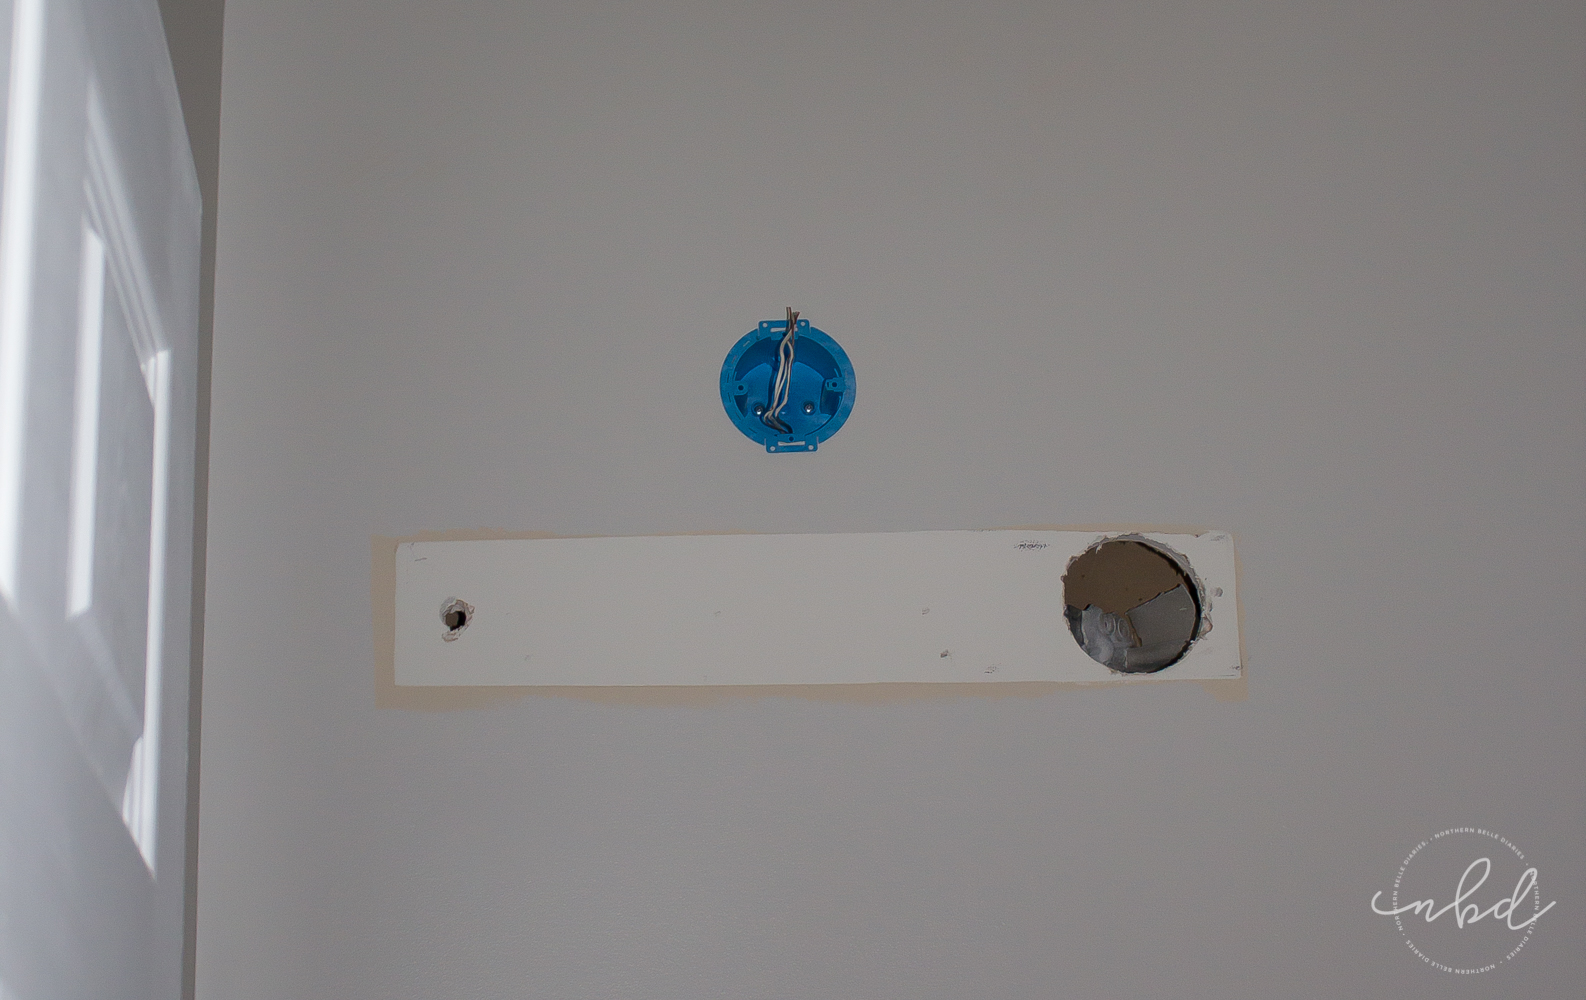
And, after the paint had dried and I thought I was ready to replace the light fixture…the unexpected happened. The light fixture’s electrical box was off-center, and I had to get help in order to move the electrical box.

I do have a few pointers when using the Devine Color peel and stick wallpaper…

Light is your friend
Because there were no windows, and I needed to get the wallpaper on before the light fixture, I had to get super creative with lighting. I apologize for the poor lighting, but it is best to apply the wallpaper without any objects in the way: i.e. light fixtures, sinks, toilets, plumbing, etc.
Are you laughing yet?

Have a second set of hands
I usually do DIY projects on my own, but I did end up needing Brian’s help. It was helpful for him to hold the wallpaper’s bottom edge against the wall while I was on the ladder sticking the top on the wall/ceiling edge. We also used a level to ensure we wouldn’t veer off-track. With our 10ft ceilings, it was super important that the paper was straight to avoid having to remove large sections.
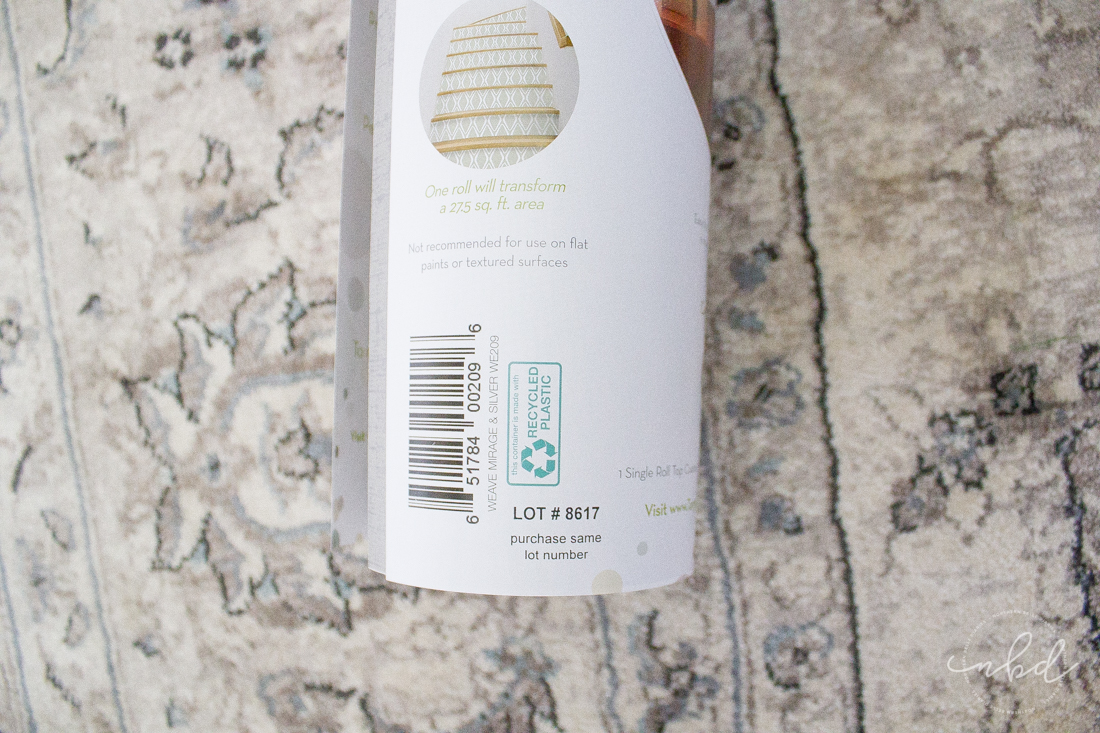
Make sure you have matching lot numbers
Ensuring you have the same lot numbers will guarantee that there are no subtle changes in color or texture between rolls. The lot numbers are conveniently located by the barcode of the product label.

Make your major cuts first
Choose a soft and safe place to measure your paper. I used the edge of our dining room rug and a piece of painter’s tape to mark the length of our walls.
The pedestal sink was super tricky. I found it easiest to measure to the top of the sink for your first cut, and then work around it with smaller portions of wallpaper. For the toilet, I did not cut the paper until I reached the plumbing (a small slit for the pipe was all I needed).

Save a few scraps for mid-project touchups
Sometimes your walls aren’t plumb or they may even have bulges, and despite your best efforts the wallpaper may lay off-kilter. As long as you keep some of the excess paper you trim at the ceiling or baseboards, you can correct any minor gaps. I had my doubts about this, but you really can’t tell that I fixed a mistake unless your face is almost touching the wall.

Now, let’s see this builder-grade half-bathroom in its former glory one last time:


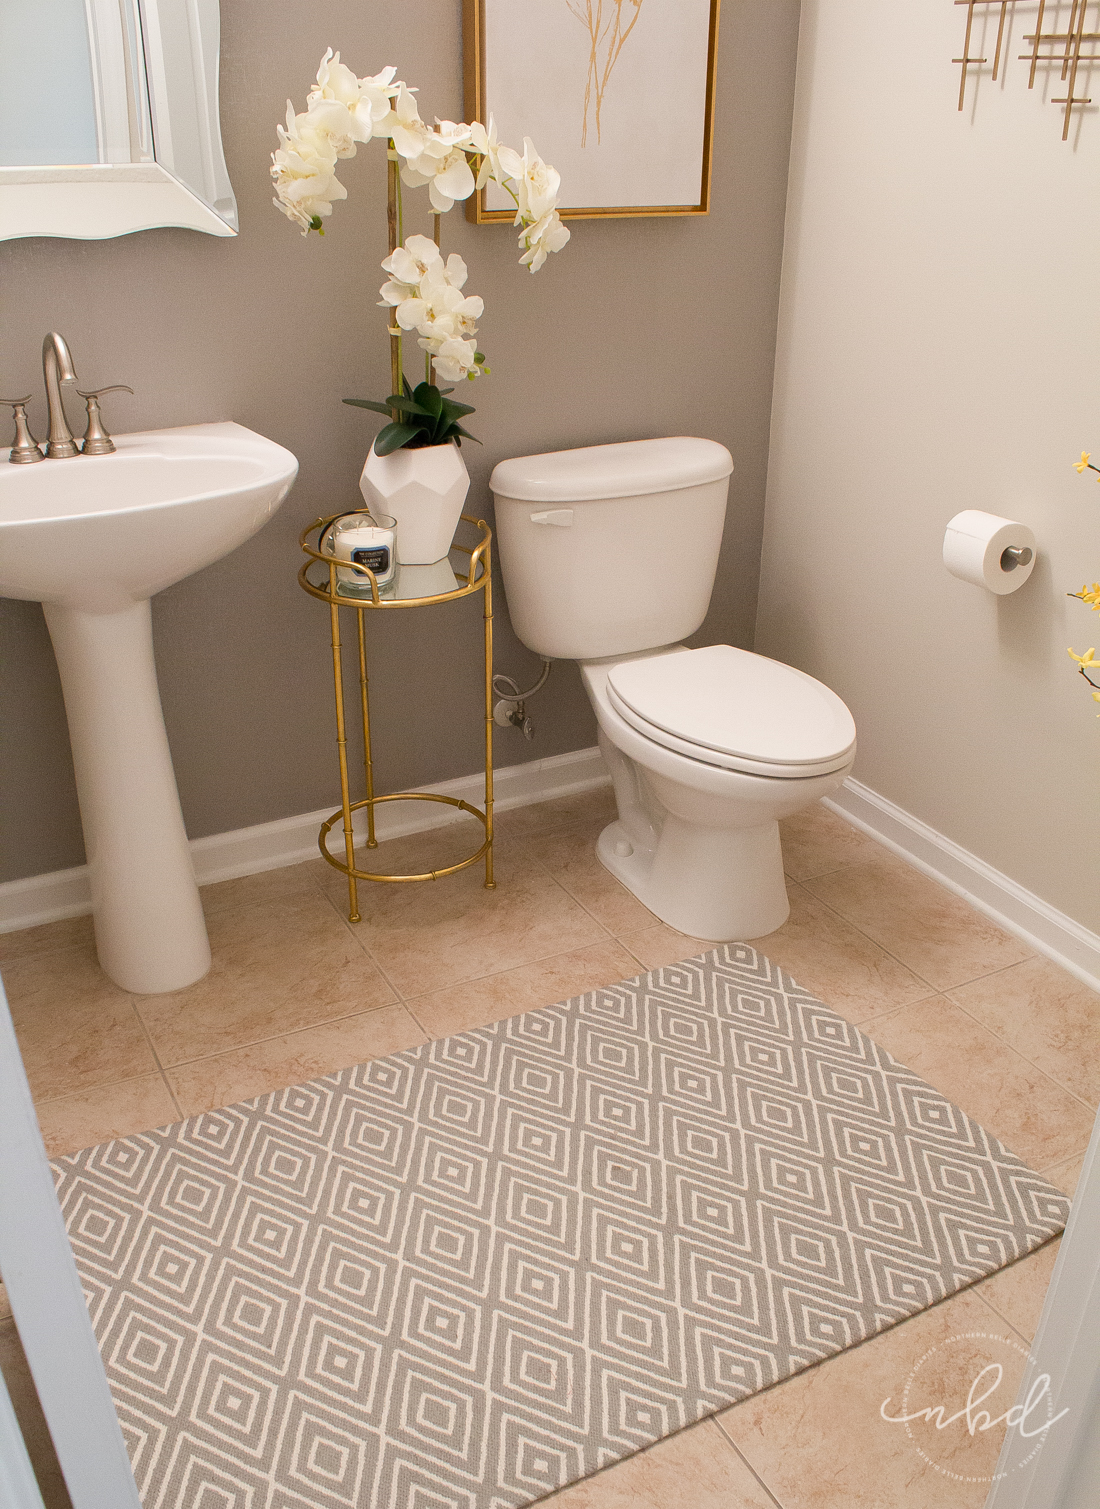
Despite adding some artwork, a new mirror, a new faucet, a Target vase and flowers, the half bathroom still looked dark and gloomy to me. It was a bathroom that was always forgotten, always a second thought. Everyone, including myself, walked past it without really noticing it, using the full bathroom down the hall instead of the half bath.


Needless to say, I am in LOVE with our new, elegant half bath! All of the work that went into it was worth it! I find myself making excuses to have to walk past it :) Now, I’m not embarrassed to guide guests to this posh new space, and every time I walk by it I pause to admire it.
I am so thankful for the gorgeous facelift Devine Color repositionable wallpaper gave to my home. I could see myself using it to makeover our pantry or even closets! If you’re looking for an inexpensive project to give your home some character, look no further! If you’re a renter who can’t (or don’t want to) paint, this wallpaper is perfect for a rental makeover!
What would YOU do with ?
Shop the Post


Katie says
Looks amazing, girl!! Amazing job. :) I love that little table it’s so nice.
-Katie | http://www.meshkomoments.com
Lisette says
Thank you so much, Katie!
Alisan says
Do you know where the little gold table is from?
Macs says
Hello dear, thank you for the good advises. I really do like the Wall it is so classic. I love your taste.
Mishaella says
Your bathroom turned out great! What color did you use on the walls without the wallpaper?
Choice Furniture Superstore says
This is really amazing. Thanks for sharing.
Loretta Heimbecker says
This is beautiful. Did you remove the sink to apply the wallpaper? How does it hold up to sink splash?
Lisette says
Thank you! I did not remove the sink, as it is fixed to the floor and wall. I did the best I could and worked the wallpaper around it. We haven’t had much water splashing since the bathroom isn’t used a lot.
Anna says
How many rolls of the wallpaper did you use?
Gaby says
I love the color of your bathroom …I painted mine and hated the color. This was the second gallon, on the wall they look different than on the paper sample you choose from home depot. Please let me know which color did you choose…thanks
Tamika says
Love the update! Where did you get the gold stand?
Tina says
I know this is so late and hoping you see this, but where did you get the mirror?