OH-KAY! Wow. What an adventure this has been so far. I used Amanda’s tutorial on Design Sponge as a guide for this next project. I’m so glad she made it easy to follow. However, my experiences thus far have been less than exasperating.
Here is the before picture. No, there is nothing majorly wrong with the color of the seats. I like them. However, if I left the seat covers this color my house would be plain vanilla. I needed color without painting my walls a demanding color (in this case, green). Some of the chenille seat covers were snagged, others beginning to be threadbare.

These are the materials I started with: cotton batting, a hammer, wire cutters (for lack of a flat head screwdriver), fabric, staple gun, staples, and poly fill (I’ll explain that one in a bit) and a small Philips screwdriver.

First, remove the nails underneath holding the chair seat to the frame. I used my Philips screwdriver.

The most annoying (and dire) aspect of this reupholstering project was the deteriorating foam padding underneath the seat cover. In the picture below, my hand is laying on the seat…and I can actually feel the wooden board through the layer of padding and fabric. Yuck! A JoAnn Fabric employee suggested I buy poly fill to correct that hole of deteriorating foam in the middle of the seat. (Fast-forward temporarily to poly fill. D-I-S-A-S-T-E-R. Like a badly-stuffed sausage!) She meant well, though! I returned the poly fill and bought four 2″ high density foam pads measuring 15″ x 17″.

Turn your seat upside down to see what surprises await you!

Here is where this project differs depending on the wear your seats have taken. Since I got this cute dinette used from Craigslist, I had to remove everything and start from scratch. If my foam cushioning were intact, I wouldn’t bother going through all the trouble you are about to see. But, my set was deteriorating so I had to do it the labor-intensive way. I removed the dust cover before anything else, with a hammer and the pliers. (This part took FOREVER!)


Underneath the dust cover were more…STAPLES!! Ack
I had to bring out the wire cutters because the back of the hammer was not working. Can you believe that JoAnn didn’t carry staple removers?

FINALLY! The dust cover was off! (I saved it to reuse)

The cording around the edge of the seat was actually a second layer under the dust cover. It was stapled on after the seat chair fabric. That meant there were double the staples to remove. (I almost fainted inside). At this point I was removing staples for over an hour.

My puppy was very curious as to what I was doing. He also was asking for attention.

“Wait, what? This thing? You need this?!”
I continued removing staples for almost another two hours, wondering if this was even worth it. The “wood” (really more of an extremely cheap MDF) was falling apart and flaking away. Here’s what I had after I removed staples:

Look at all those staple holes! It took over 2 hours to remove them all. Some of them were rusted inside the wood, so they broke into several pieces during the process. Not fun. If your cushions are good, I recommend you skip this process and just cover over everything and save yourself the headache!
My next step was measuring up the foam up against the wood seat. Imagine my surprise when the foam that I thought would be too big all around actually didn’t measure up!

That was 2″ high density foam that I bought at 50% off at JoAnn Fabric.
Wait for the 50% ALL FOAM sales they throughout the year. Also, they often have 20% coupons for your ENTIRE purchase. I am going to have to return these foam chair seats (they ended up being just under $18 with my coupons) and try again.
I discovered that the manufacturer used 1/2″ foam in two layers: one with the exact dimension of the wood, a second that covered the edge and went over the lip, giving that nice rounded corner look. I will be doing just this, but with 1″ thick foam covering the top and another 1″ thick sheet going over the edge. You don’t want to feel the wood. After that, I will cover the foam with batting to give an added layer of cushioning and smoothness to prepare for the fabric.
This was a much more productive run! Amazing what can happen when you have all the right materials at your disposal! Last time I sat down to reupholster a seat for my dinette I had a chair pad (foam) that was several inches too narrow on all fronts. How frustrating! I went back to JoAnn a few days ago and swapped those chair pads for squares ones that were 22″ on each side. They only had three 1″ high density foam pads, so I had to get 2″ thickness, praying that I had enough fabric (I did).

These covered the widest part of my seats (20″). My seats taper towards the back, so I will have to do some extra cutting.
These were my tools: a permanent marker and my bread knife. You can be fancy and use an electric meat carver, but I don’t have one.

Trace your seat with the permanent marker.

When you are cutting, MAKE SURE YOU MAINTAIN AN UP-AND-DOWN MOTION. Do NOT cut at an angle. I learned this the hard way. Your seat will be lopsided and you will have to conjure up a way fill in what you’ve cut out. (This high density foam is NOT easy to cut, so cutting small pieces to make up for mistakes won’t happen).

Using an upholstery adhesive, you will glue the foam to your wooden seat for easier upholstery. Trust me, you’re gonna want to go outside for this.
This stuff sprayed out like Spiderman’s webbing shooting from his wrists. ( I wish my “spidey” sense had forewarned me). It was white, sticky, and came out in a vertical line as opposed to the usual conical sprays. Do this on cement or anything you don’t want to preserve, like grass. It can get messy quick, if you’re not careful.
Follow the instructions EXACTLY as printed. I sprayed both foam and wood and waited about 30 seconds (under the hot Georgia sun) for it to dry to a “tack.” To me that meant no longer translucent. Then I placed the foam onto the seat.
Note: this WILL be permanent so proceed carefully. If you feel like you might have to reposition your foam for whatever reason, DO NOT spray both sides. When they say “it is a permanent bond” they MEAN IT! Once I set it down it would not budge.
Once you have your foam glued (should take less than 30 seconds–really) you lay your seat (foam side down) on cotton batting.

Staple the center edge on the first side. Pull the batting tightly; and wrinkles or folds in the batting will create an uneven base for your fabric. Work your way around and staple the center edge of the remaining 3 sides. If it’s not as snug as you need it to be you can always remove that one staple and re-tighten.
The cotton batting will smooth out the transition from the foam’s edge to the wooden seat. In my case, the batting also provided padding for the uneven cutting of the foam. I had to cut extra snippets and place them in the gaps to make up for my mistake. Live and learn.
Work your way around the seat and staple the batting to the seat. I used my permanent marker and circled the nail holes underneath the seat to remind me of the space I needed to have clear.


I played around with different folds until I settled for this one. I found this the least bulky under the fabric. Trim off excess batting once you’ve stapled it all the way around, and staple your corners. Then place your seat base under your fabric so you can see exactly how you want the fabric’s pattern to lay across your seat. I was worried about the extra height of each seat and the 2.5 yards that I purchased. I thought I would not have enough. Thankfully I was able to take some time and carefully plan how I would maneuver my fabric so that the design would be centered on each seat. I found that I could make two seats using the 54″ of width of the fabric as opposed to picking a location along the 2.5 yards where the pattern looked nice and end up wasting fabric. Smart, I know.

This ended up being a few degrees crooked (in my opinion) but, since the print is so busy, it hides well and I can live with it.

Carefully lifting your seat with the fabric, staple the fabric onto the wood with one staple in the center of the seat’s side. Once I knew I had it where I wanted it, I stapled one on either side of that center staple. I had not cut out my fabric yet so I wanted to be careful.
Work your way around the fabric, stapling and trimming until you get a rough square shape that’s easier to work with. While you’re at it, take a tape measure and measure the width of the fabric so you have a general idea of how much fabric you’ll need for each seat.

This was my first time reupholstering ANYTHING. I know I could have measured the length + width of the seat, added 3″ to each side (2 for the height and then 1 more to fold over), and then cut a square of fabric for that measurement. However, I did not want to mess up the pretty damask pattern for the sake of simple arithmetic. I also did not know if I estimated the correct yardage. I ALSO was hoping to have enough fabric left over for a window valance for the kitchen and perhaps a scrap for an idea I have for an oven door towel.

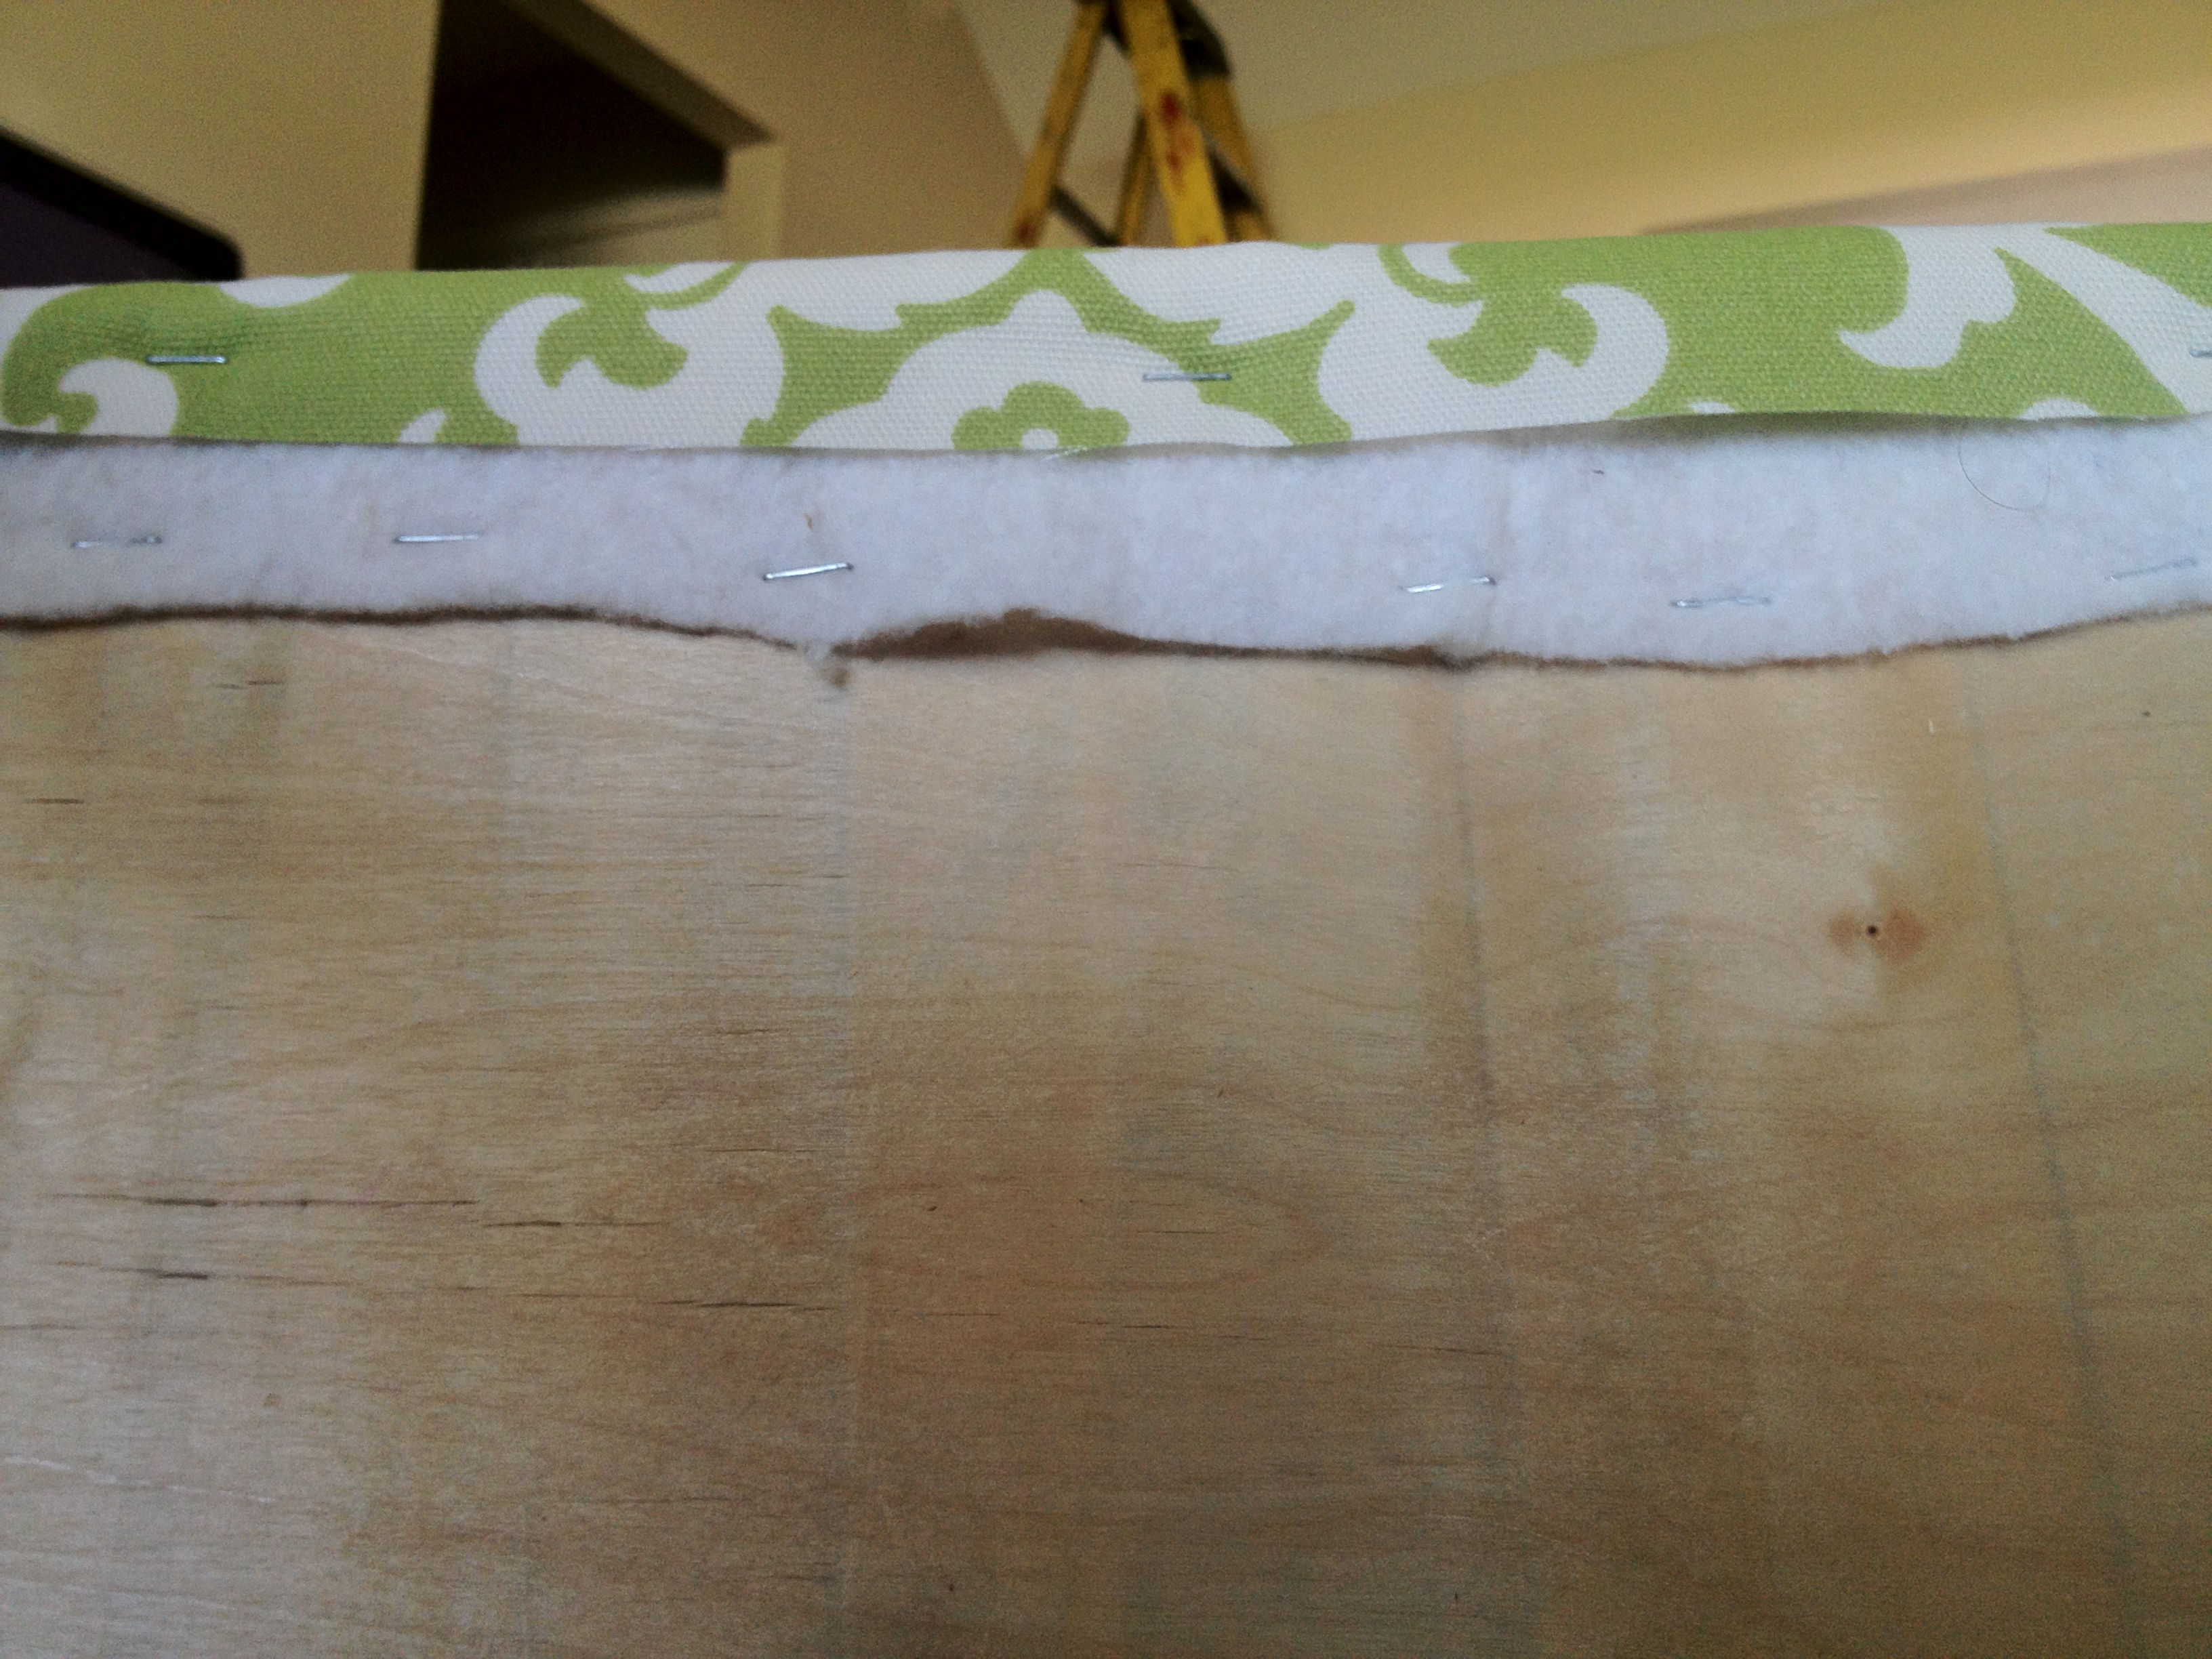
I gathered the corner like the original seat’s corners were. This lends to a nice rounded corner. If you want a square corner you would have to do a simple fold like I did with the cotton batting. You can see that my fabric is not even around the seat–this is deliberate. It was more important to me that the print was centered on the seat. Once you have stapled the fabric snugly (but not too tightly) around each side, make sure your screw holes are exposed. If not (see below, bottom right corner) you will have to trim back some fabric and/or batting to expose them. You don’t want the layers of batting, fabric and then the dust cover getting wound around the screw. That would be a nightmare.

I brought the dust cover back out and lined up the holes from the screws in the wood to their corresponding parts on the dust cover. As you can see, this dust cover is pretty see-through. Remember, no one sees this side of the seat except maybe your dogs (and an extremely nosy relative). If it bothers you, you can always buy black dust cover material at Joann. I think it’s $7.99 for 5 yards. That was an additional $8 I didn’t care to spend money on, so I reused what I already had at my disposal.

After all my work was done, I screwed the seat back onto the chair and admired my work. Note that I already spray-painted the chair brown. Might as well get that done while the seat was off, right?

BEFORE
And here is the after:

I love it! I love the brown richness of the metal now after spray painting it. I like both the before and after looks but now this also reflects a little of me in it.
This is so easy anyone could do it. Don’t be discouraged. The first seat I reupholstered coincidentally was also the most beat up one, but the rest were relatively a breeze.
Have you ever tried reupholstering anything yourself?