Have you ever wanted to have a garden or landscaping with curb appeal that you can be proud of? Are you lost on where to start, or what to prioritize when you’re working on a budget? I’ve been there, friend. But fret not. I’m so excited to partner with First Editions® Plants to bring you lessons I’ve learned that have helped me transform our yard from blah to WOW over the past couple of years.
Adding Curb Appeal Through Landscaping
Below, I outline how to tackle your landscaping, and what items to prioritize. And, don’t worry if you can’t accomplish everything in one year. Seriously! Improving your landscape doesn’t have to be expensive, but sometimes if you are starting with a blank canvas (like I did) it’s a good idea to break up your landscaping goals into smaller chunks over a couple of seasons.

Know Your Growing Zone
Before you fall in love with something on Pinterest or Google image search results on your gardening quest, make sure you are aware of your USDA growing zone. The USDA makes it easy to find your growing zone by entering your zip code here. Jacksonville is in USDA growing zone 9a and I had to learn the hard way to listen to this map. If you click on your state on the interactive map, it will zoom in to show you a more detailed map to help you plan your garden.
Get Inspired
Have a bare landscape? The possibilities are endless! Pick up one of many home décor and gardening magazines at your local supermarket checkout lane for ideas on curb appeal. I love seeing all the wonderful ideas for gardens, including those that are “hardscapes” with lots of rocks and pebbles.
This is also a good time to learn your gardening style. Remember, gardening is a form of self-expression. Do you prefer informal, cottage garden styles? Or do you prefer formal, manicured gardens. I love the latter, and so I knew that I wanted structure and symmetry in my garden. This will help immensely in my next point.

Plan, Plan, Plan
It’s important to sketch out your garden beds how you’d like them to look in the end. I like to use Photoshop to plan my garden beds. You don’t need to use Photoshop to help you plan, but I found that this was the most realistic way for me to visualize everything before I spent money and time planting things.

One super important thing to keep in mind when selecting plants is MEASURE THE SPACE YOU HAVE. Don’t fall for the trap of planning for your plant’s CURRENT size. Look at the spacing instructions on your plant’s tags. Some flower bed dimensions you can’t change (such as those that are surrounded by cement). Others, if they are in your lawn, you can adjust to accommodate the plants you want to have.

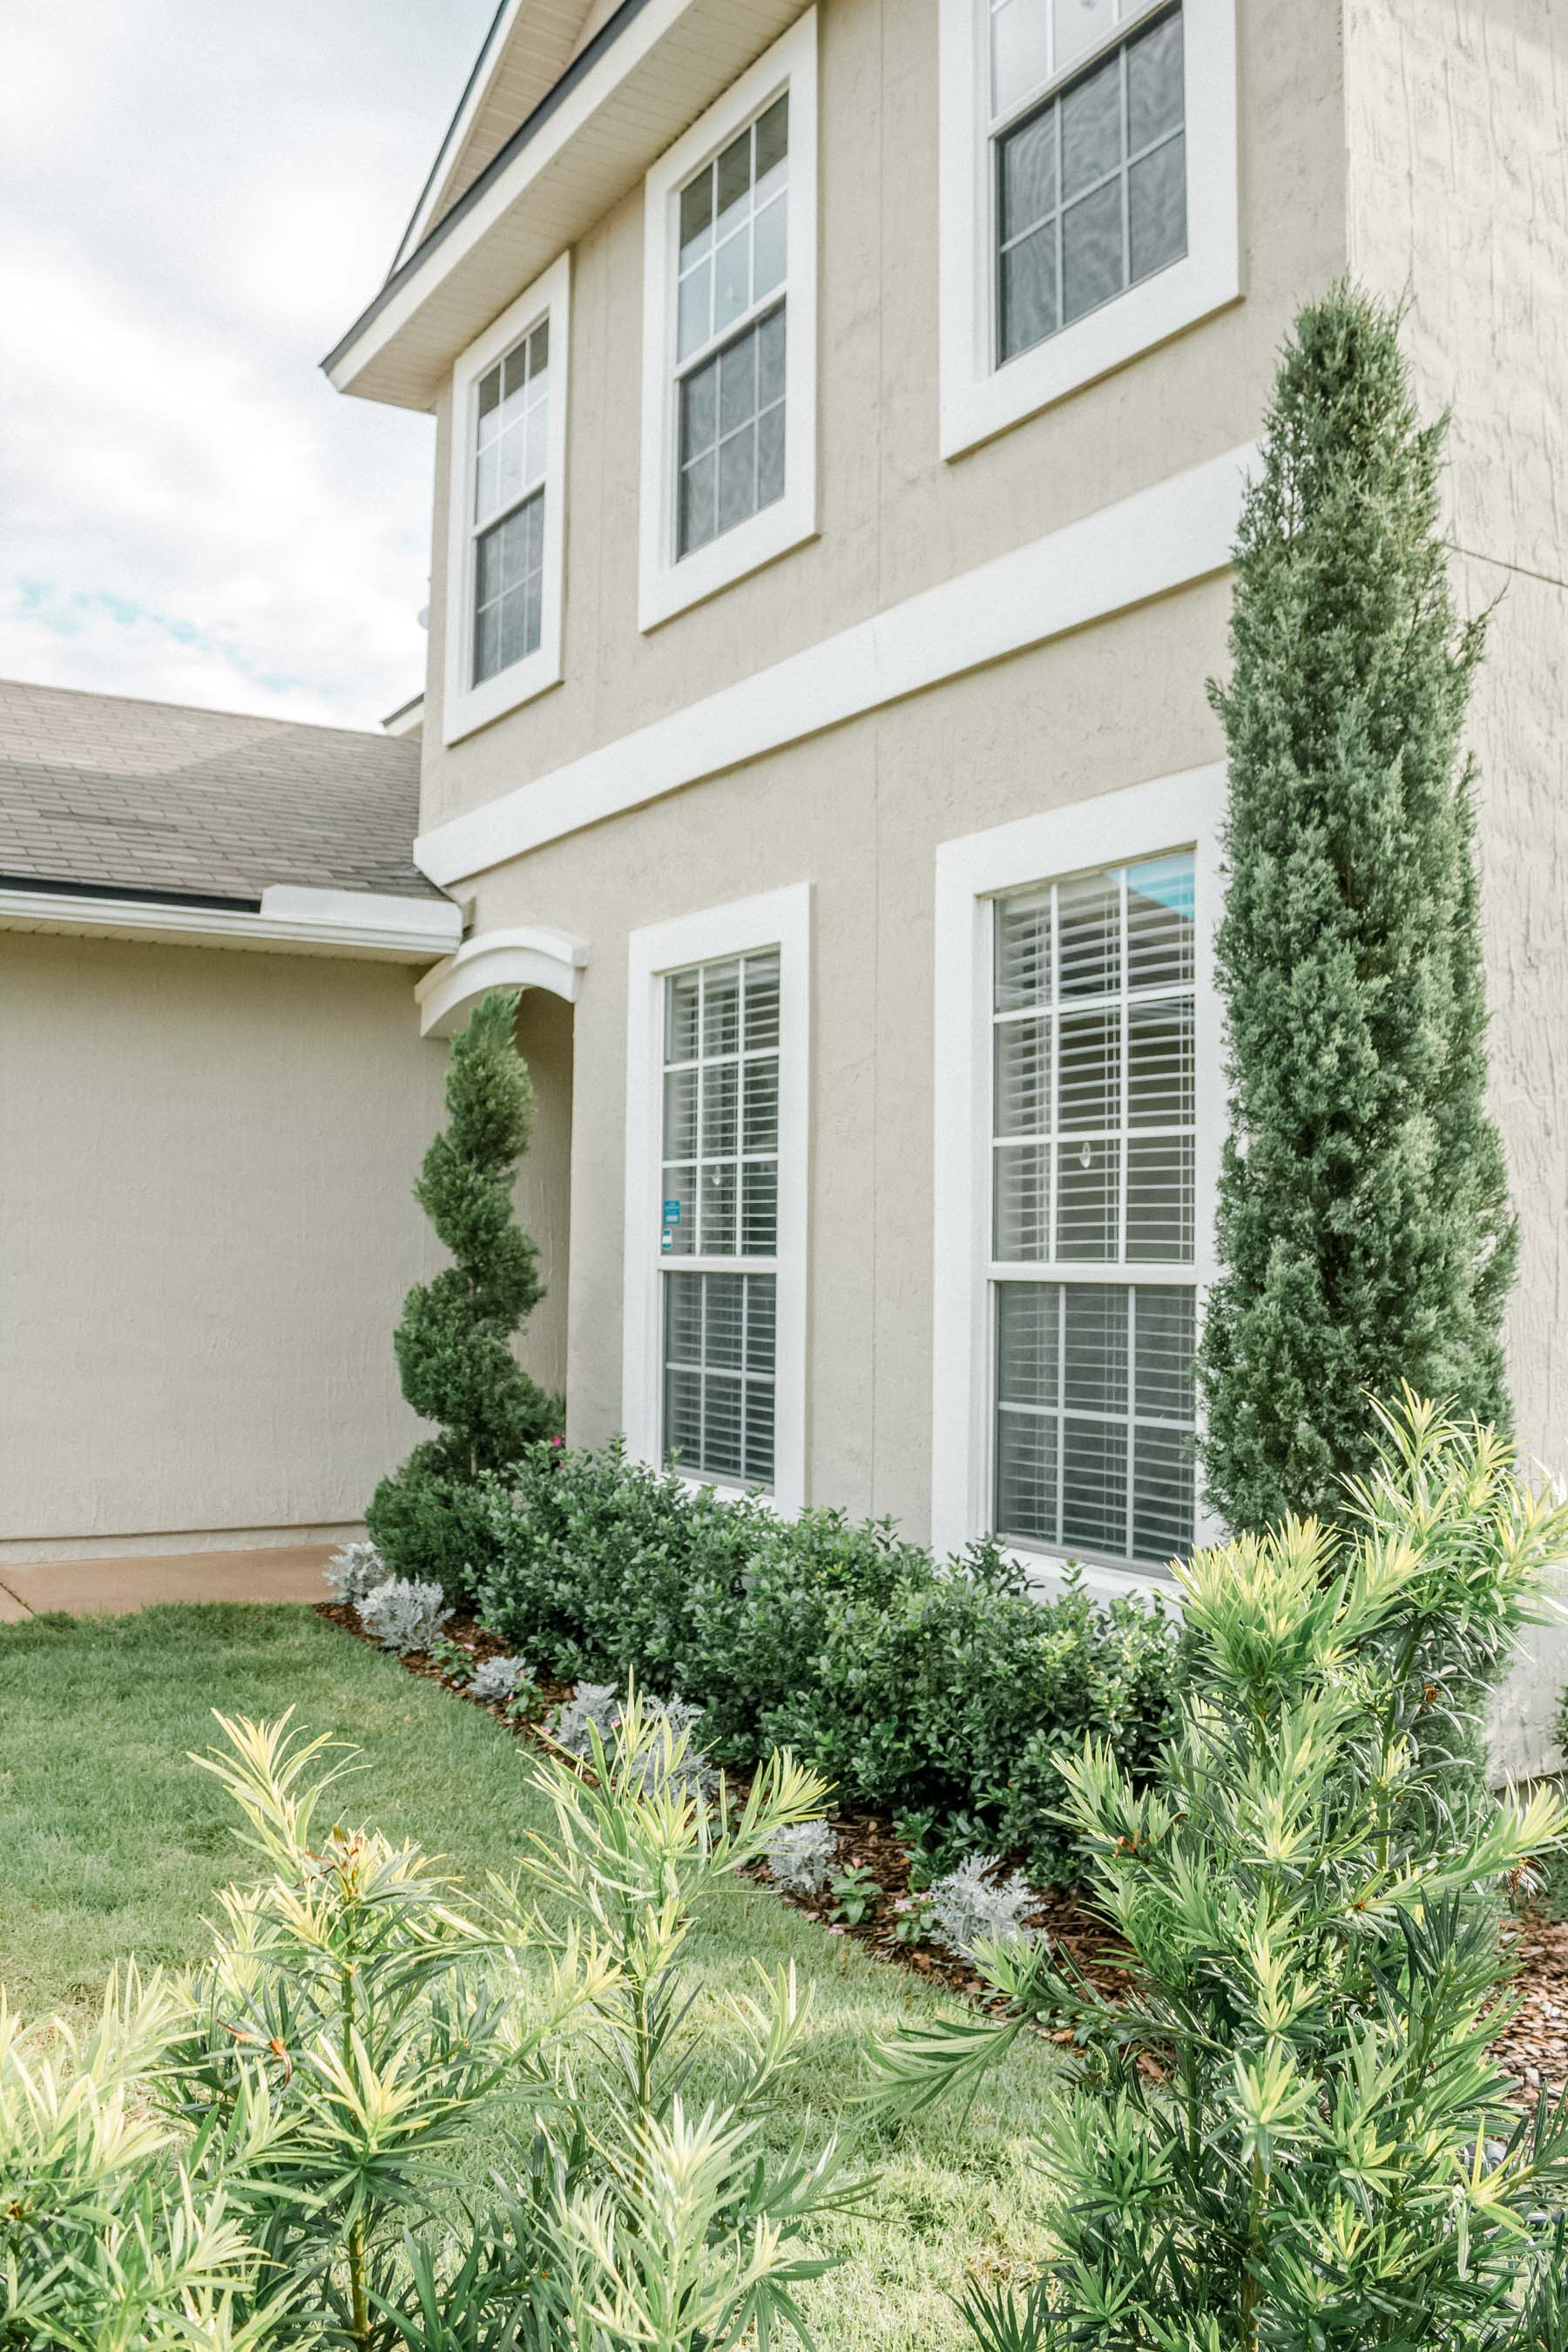
After our honeymoon in Italy, I fell in love with the tall cypresses all over Rome. I knew that I wanted them in my landscape, so I measured and planted accordingly even if it looked odd, and even when my neighbors questioned my judgment. Now, they’ve asked me if I’ve moved the one that grew over 15 feet since it looks closer to the house than when I initially planted it far away. Hint: I haven’t. If you plan and execute accordingly, your plants will grow into the space you created for them. Always trust the spacing requirements!

Prioritize Projects
After you have planned your landscape, prioritize what you can do (and afford) in one growing season. The first year in our home, we had a lot of expenses. However, our HOA demanded we lay down new sod. This wasn’t something we could drag our feet on without incurring fines. If you can’t feasibly do this, consider laying down new mulch. You can find mulch at 10 bags for $10 during the spring and spread it on the flowerbeds to prevent weeds from taking over. You’d be surprised at how much curb appeal this small investment can add to your home.
The second season, after I had a whole year to observe how the sun hit different parts of our property over the course of the year, is when I started buying special plants such as roses and hydrangeas. Roses need full sun, and hydrangeas wilt in full sun. Taking the time to observe how lighting changes throughout the year helps you avoid heartaches and wasted money.
But one of my most important tips: if you need to prioritize due to your budget, prioritize by incorporating evergreens into your plan!
Invest in Evergreens
Evergreens are the backbone of your garden. Just like a tailored blazer or tailored jeans are the base of a great outfit, evergreens will ALWAYS polish your landscaping. When the middle of winter has everything looking dead, your evergreens are the ones that give life to your landscaping.
Even though I know our USDA planting zone, I have had a couple of disappointments in plants not thriving in my garden. Lavender was one of those plants that my local hardware store carried, but the humidity killed it. So when I learned that First Editions® Plants had plant cultivars recommended for the South, I was intrigued.

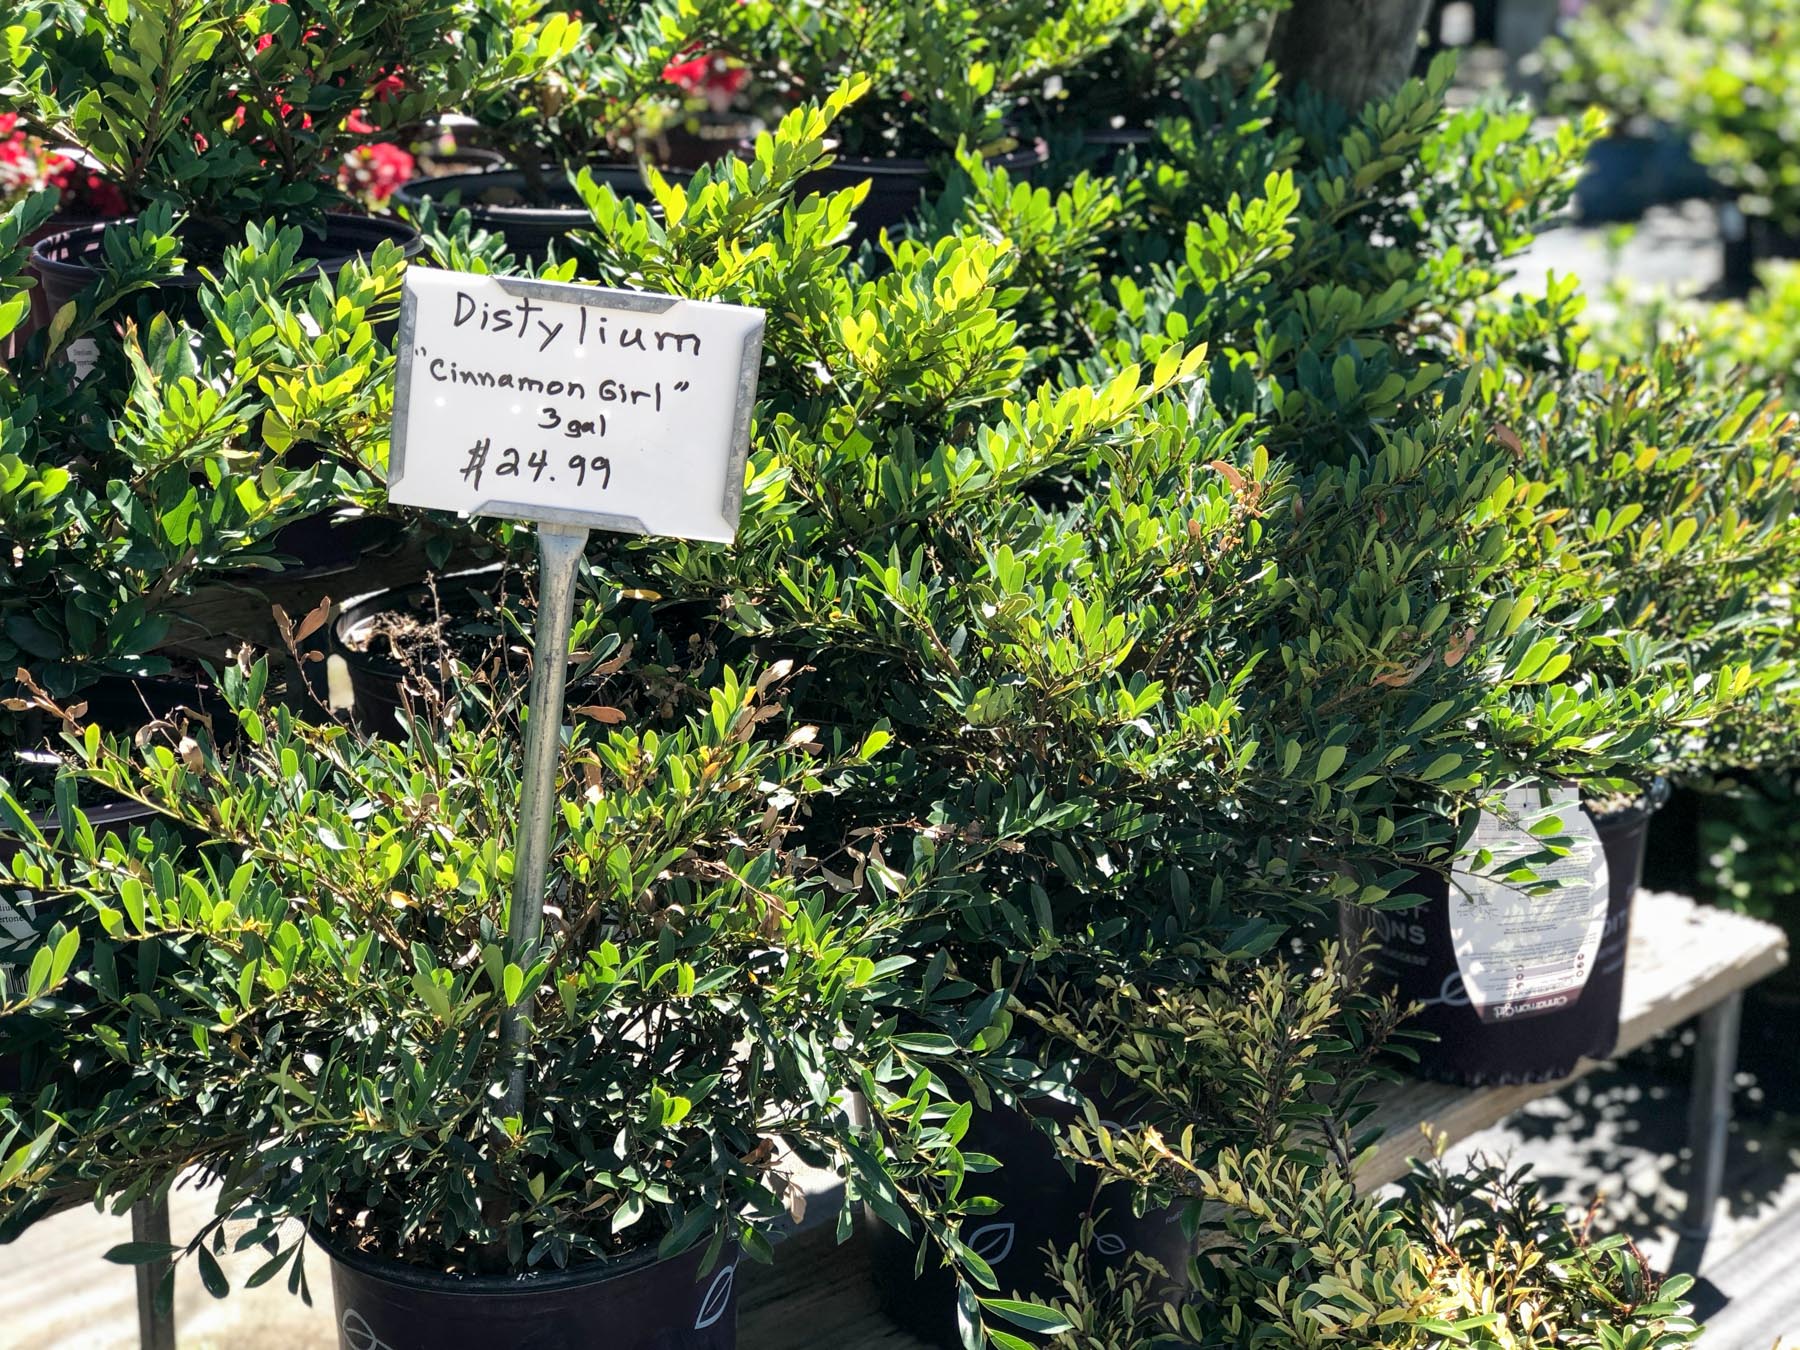
First Editions® has beautiful plants that have been rigorously tested so I can feel confident they will flourish. If you are unsure about a plant, First Editions’ plant guru can help with any question you have about gardening on their Let’s Ask Amy page. The varieties of Crepe Myrtles and Distyliums, particularly the Vintage Jade Distylium, caught my eye.

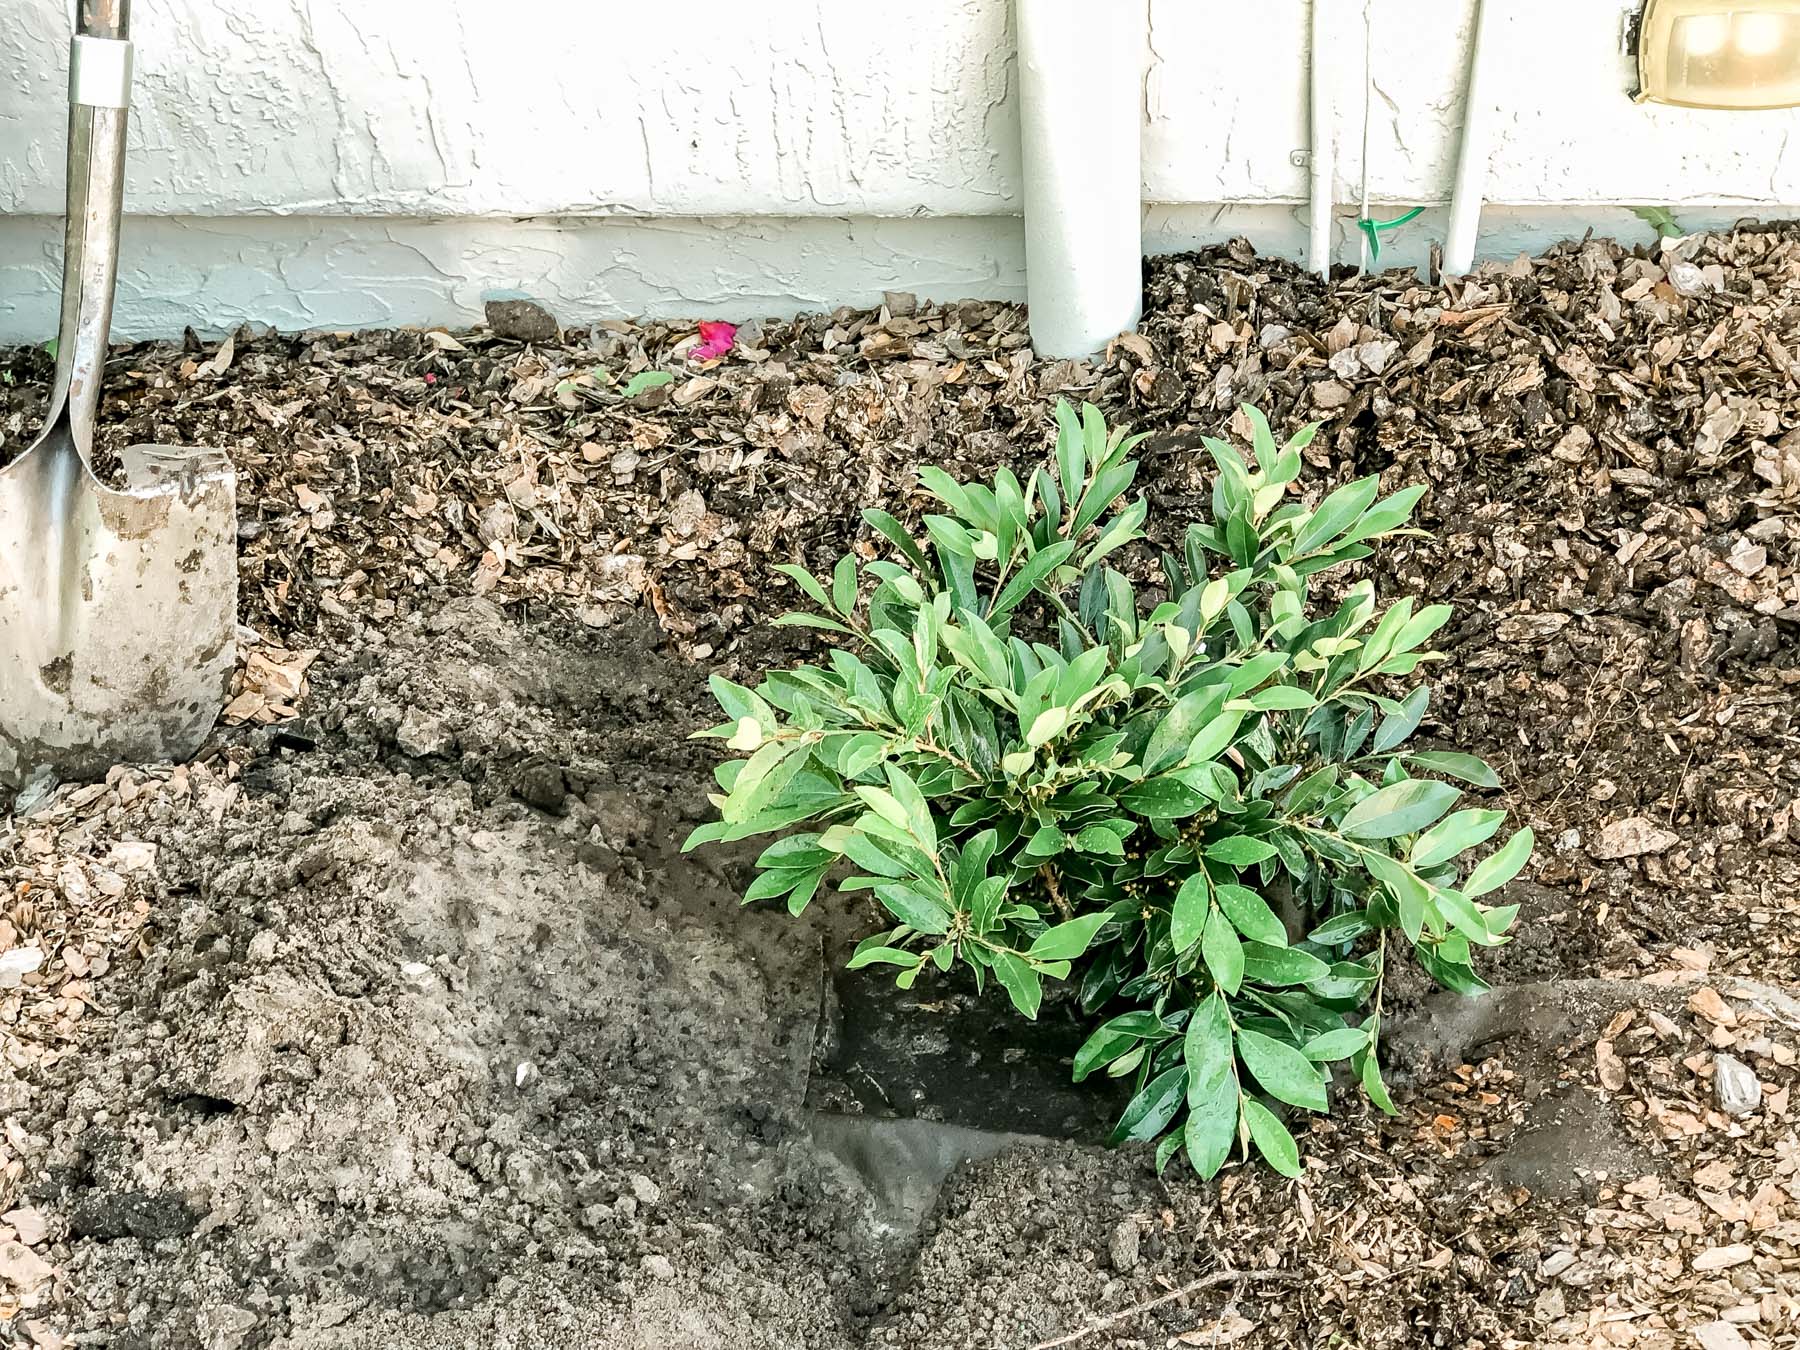
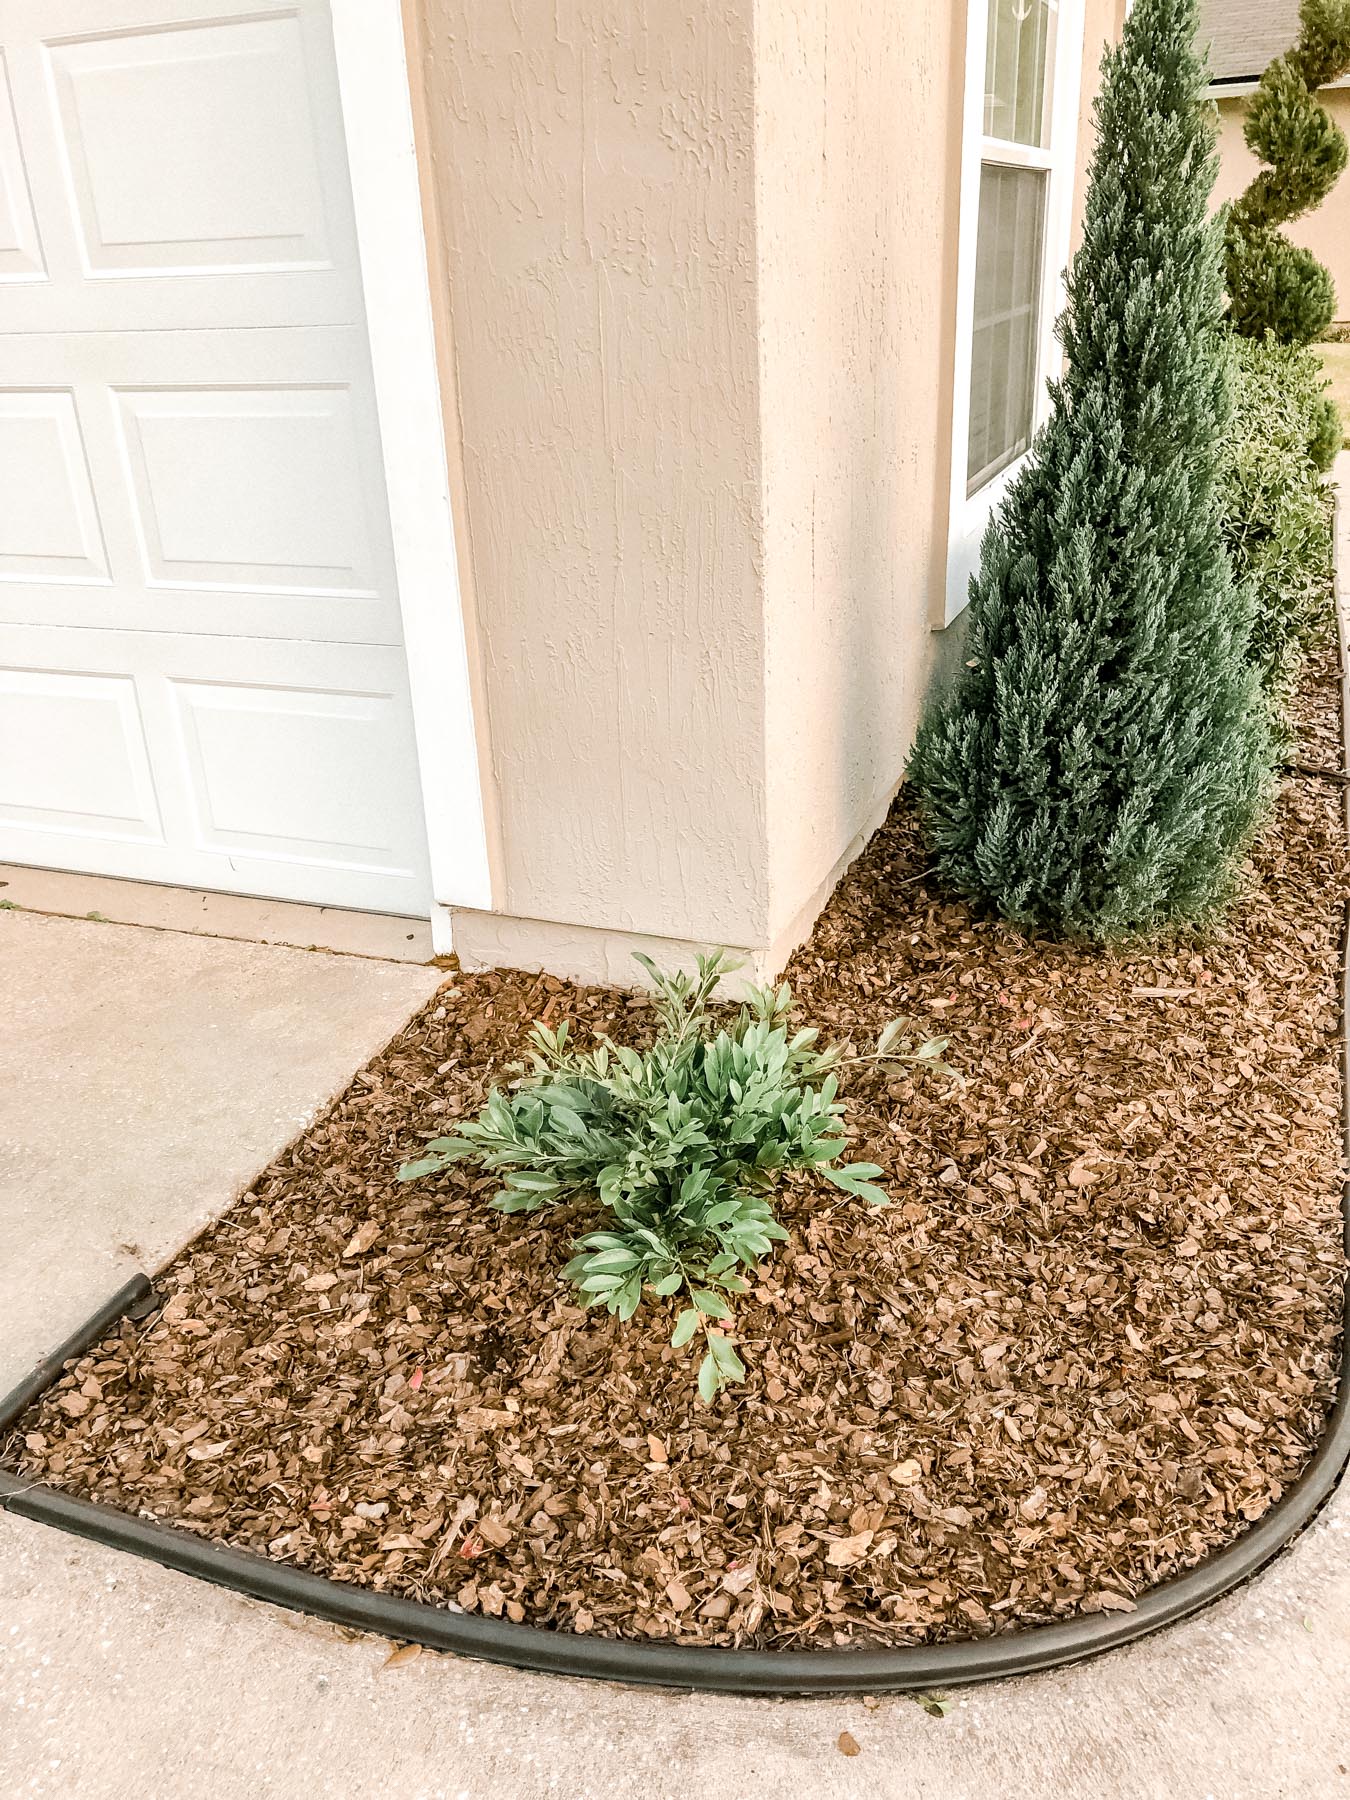
This charming shrub has a mounding habit, spreading 4-5 feet and growing 3-4 feet high. I immediately knew they would be a great candidate dress up my garage beneath the carriage lights. A member of the witch hazel family, petite red flowers appear in the winter. This adaptable plant grows in full sun or part shade, tolerates drought, heat and wet soil, making it a PERFECT choice for my area!

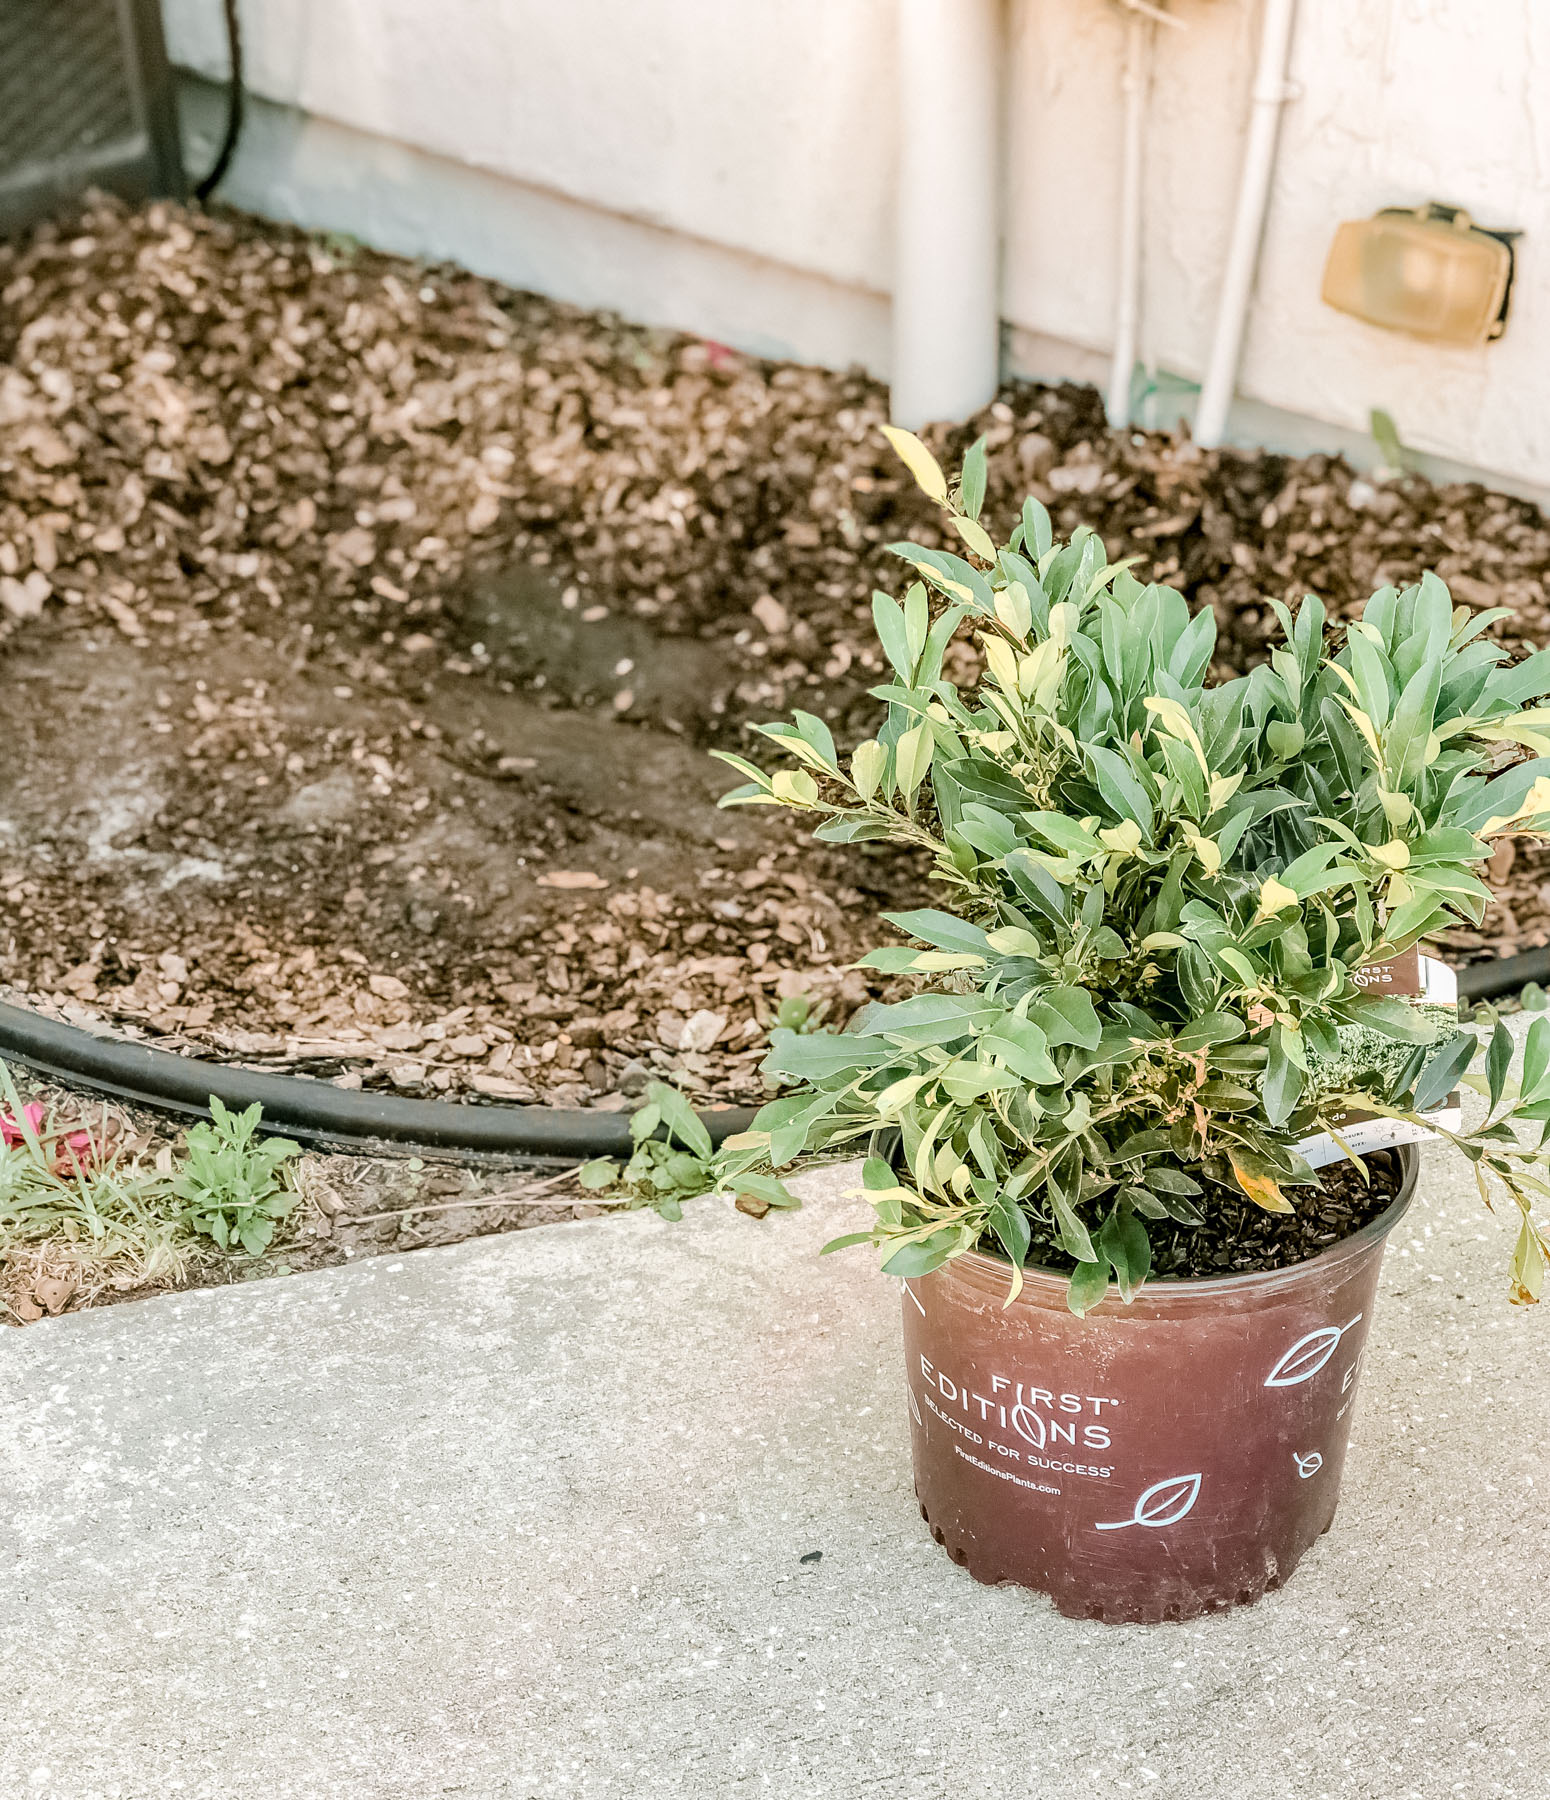


Distylium is a good alternative for boxwood, cherry laurel, holly and juniper in foundation plantings or anywhere you want low maintenance evergreens. Since I already have boxwoods, holly and juniper I knew this would be the perfect addition to the existing flowerbed.

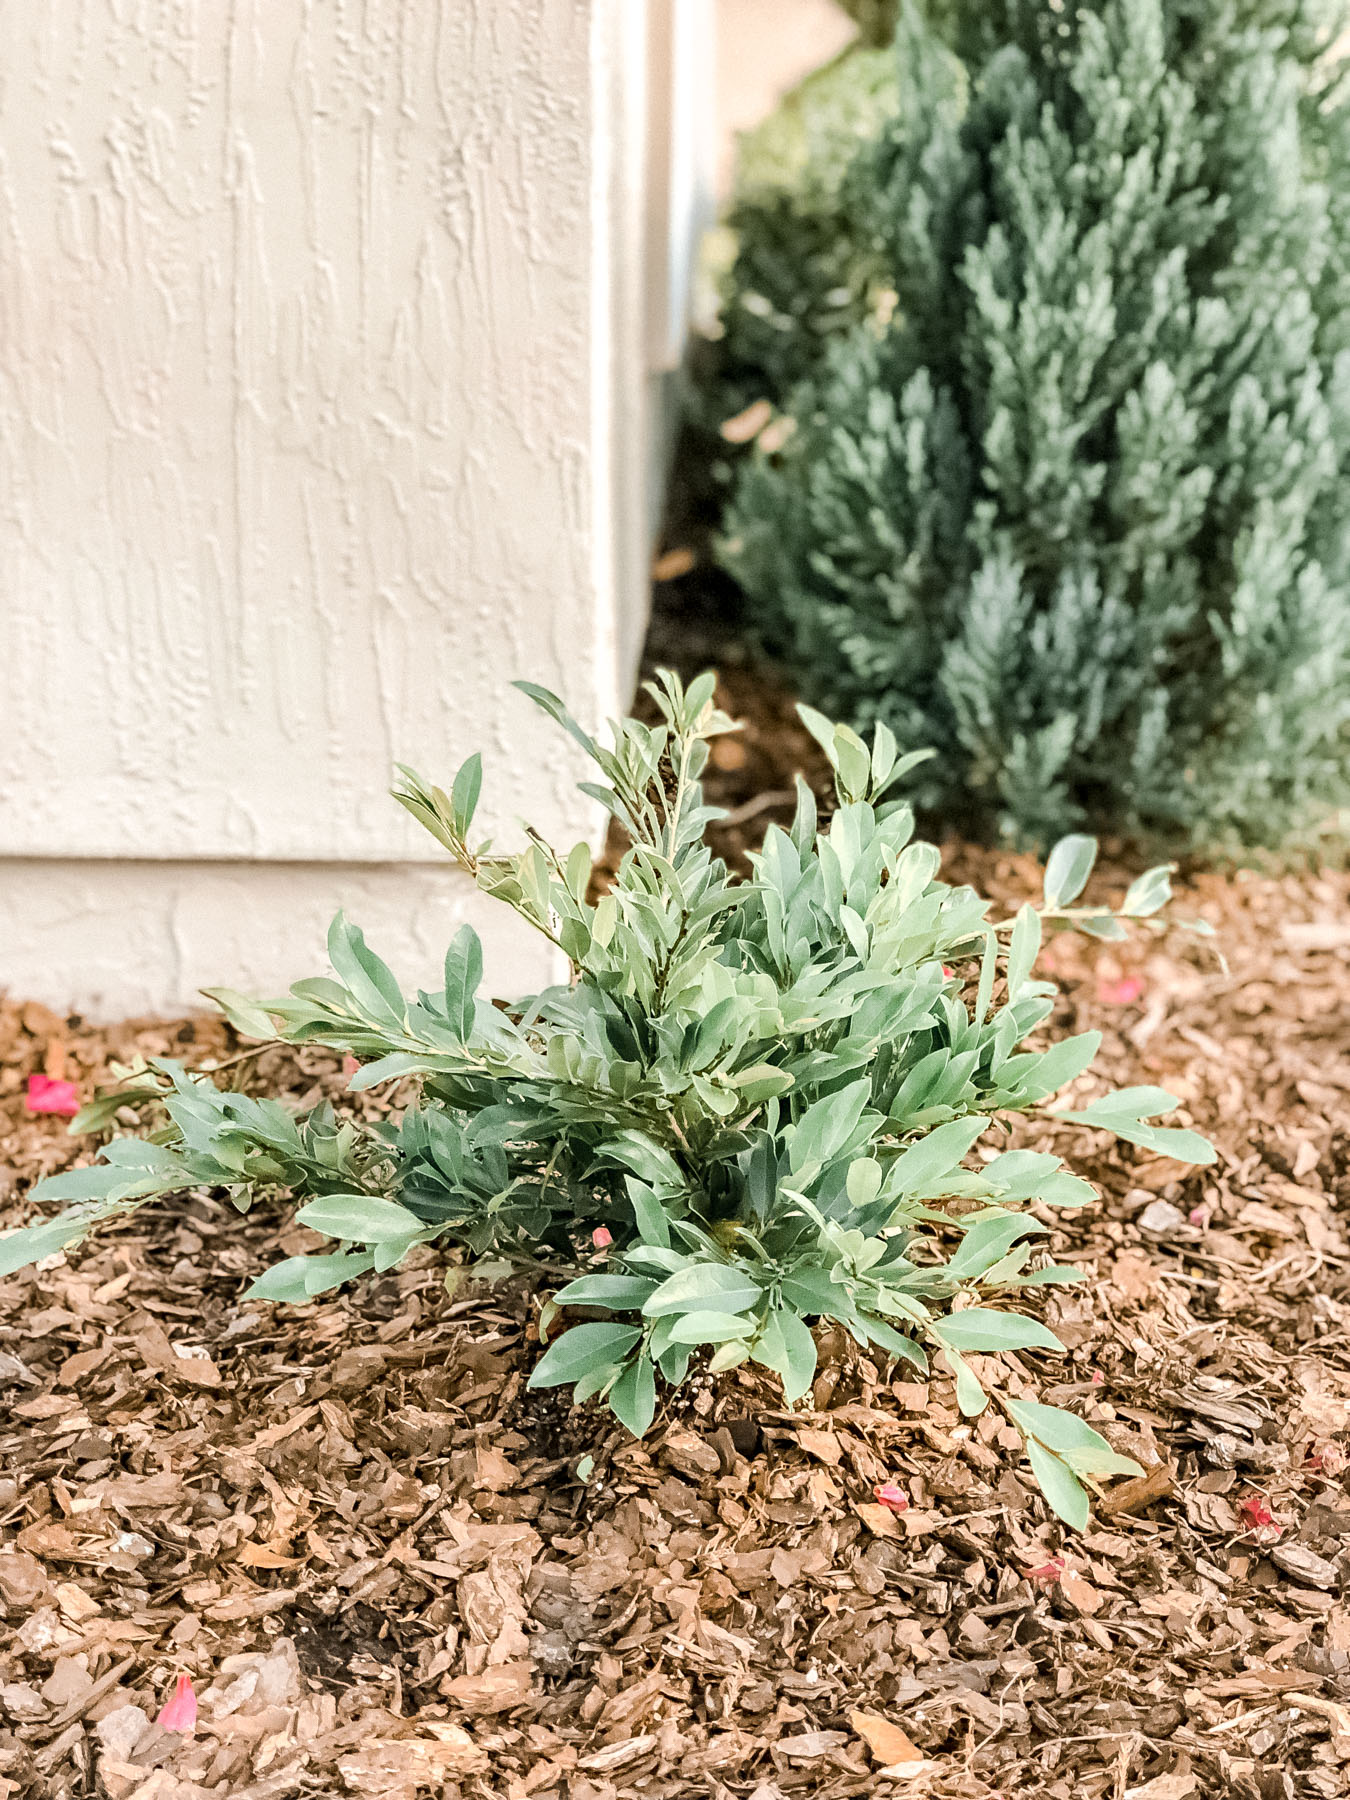

This particular view of the house has bothered me for a while, but it wasn’t a priority. The Vintage Jade Distylium is a perfect for either side of the garage due to its full-grown size. When fully grown, the shrub will hide those ugly utility boxes while still allowing us access to them. Also, I won’t have to worry about it covering our carriage lights since it only grows to 4′ in height. They may look tiny in this bed, but in two years’ time, they will look nice and cozy!
Play with Color
While Brian and I need muted, neutral colors indoors to keep “zen,” outdoors is a different story. Gardening is another form of self-expression. I like to use between one and three colors (other than green, of course) in the garden. I love bringing in color through annuals, as I can change out the colors every year as the annuals fade. Petunias and Vincas have done the best for me in the full, Florida sun.

You can also bring color to your garden by choosing plants with foliage color that is not green. Loropetalums have deep maroon leaves that make a striking contrast against evergreens. Plus, they have beautiful little pink blooms in the spring. They are a breathtaking characteristic of spring in the South that sometimes are overlooked when the azaleas are in bloom.
I love playing with different shades of green. The yellow greens of my boxwood pop against the blue-green leaves of my roses, which are in contrast to the true green of my podocarpus hedge.
Group Plants in Odd Numbers
When planning your landscape, sometimes a space calls for multiple plants of a certain specimen (i.e. hedges, mailbox planter, edges of property, etc). Planting plants in odd numbers looks better than even numbers. For example, if you plan on incorporating showy plants such as crepe myrtles, purchase 1, 3, or 5 of them depending on how much space your garden has in order to achieve balance and harmony.
Polish off with Mulch
Last but not least, use mulch to finish off your hard work! Adding mulch to your landscape not only makes it look better, but it has several benefits. Mulch helps your plants’ roots stay cool and hydrated, saving you money on watering and also helping them battle the elements. Mulch also helps prevent the stray weed seeds from taking over your beds. I love using mini pine bark nuggets, as the rich brown complements all the greens and pops of color from annuals.
I hope you’ve found this helpful! Please reach out to Let’s Ask Amy if you have any questions! I love chatting about plants! And to help you out with your gardening and landscaping plans, be sure to enter the sweepstakes for a $100 Visa Gift card!
What is on your gardening and landscaping wishlist?
Let me know in the comments for a chance to win a $100 Visa gift card! (giveaway closed)